Cart
0
You may also like

Book a call with our development team to get started.



Apply online and access wholesale pricing.

If you need quick, elegant gift packaging that looks professionally made but takes only minutes to assemble, a pillow box diy project is exactly what you're looking for. This curved, pillow-shaped container requires no glue, no tape, and minimal materials—yet delivers a polished presentation for jewelry, treats, party favors, and small gifts. Whether you're wrapping bridesmaid presents, packaging homemade cookies, or creating party favor boxes for fifty guests, pillow boxes offer a practical solution that doesn't sacrifice style.
The pillow box stands out in a sea of rectangular packaging because of its distinctive curved ends and self-closing structure. Unlike traditional DIY gift boxes that rely on adhesive or complex folding patterns, pillow boxes use a simple tuck-and-fold closure that holds contents securely while maintaining an elegant silhouette. This tutorial walks you through the complete process, from selecting materials to decorating finished boxes.
Pillow boxes earned their name from their resemblance to a soft bed pillow—rounded ends that curve inward to meet at the center. The design eliminates the 90-degree corners and flat panels found in cube or rectangular boxes, creating a softer, more organic shape that feels special without being fussy.
The construction is surprisingly simple. Most pillow boxes consist of a single flat piece of cardstock or paper that's been die-cut or scored with curved flaps on each end. When you pop the center section open and fold the flaps inward, they interlock to create a secure closure. No adhesive is needed once the box is assembled, though the initial flat template may have one glued seam along the body.
This streamlined structure offers several practical advantages. Pillow boxes ship and store flat, which saves space in your craft room or retail storage area. They assemble in seconds—a crucial benefit when you're packaging gifts for a large event. And because the shape itself is decorative, pillow boxes look finished even without elaborate embellishments, though they also serve as an excellent canvas for stamps, stickers, or printed designs.
According to PMMI, the packaging industry has seen increased demand for easy-assembly formats that reduce labor costs while maintaining visual appeal—a trend that has made pillow boxes increasingly popular among small businesses and home crafters alike.
The beauty of pillow box diy projects lies in their minimal supply list. At its most basic, you need only paper or cardstock and a template. That said, the quality of your materials directly affects the finished result, so it's worth understanding your options.
Paper weight matters. Lightweight copy paper (20-24 lb) will fold easily but won't hold its shape or support much weight. Medium cardstock (65-80 lb) strikes the best balance for most applications—sturdy enough to protect contents but flexible enough to fold cleanly along the curves. Heavyweight cardstock (110 lb and above) works for larger pillow boxes or items that need extra protection, though it can be challenging to fold without scoring tools.
Material choices include: Kraft paper for a rustic, natural look; white or colored cardstock for a clean, modern aesthetic; patterned scrapbook paper for decorative designs; or specialty papers like vellum or metallic finishes for upscale presentations. If you're making boxes for food items like cookies or candies, choose food-safe paper or line the interior with parchment or wax paper.
Beyond paper, you'll want: A pillow box template (downloadable online or hand-drawn), scissors or a craft knife for cutting, a bone folder or the back of a spoon for scoring fold lines, and optional decorations like ribbon, stamps, stickers, or twine. If you plan to make pillow boxes regularly, a personal die-cutting machine with pillow box dies can speed up the process significantly.
For crafters who prefer ready-made options, a cube kraft gift box offers similar quick-assembly convenience in a traditional square shape, while pillow boxes provide the curved alternative.
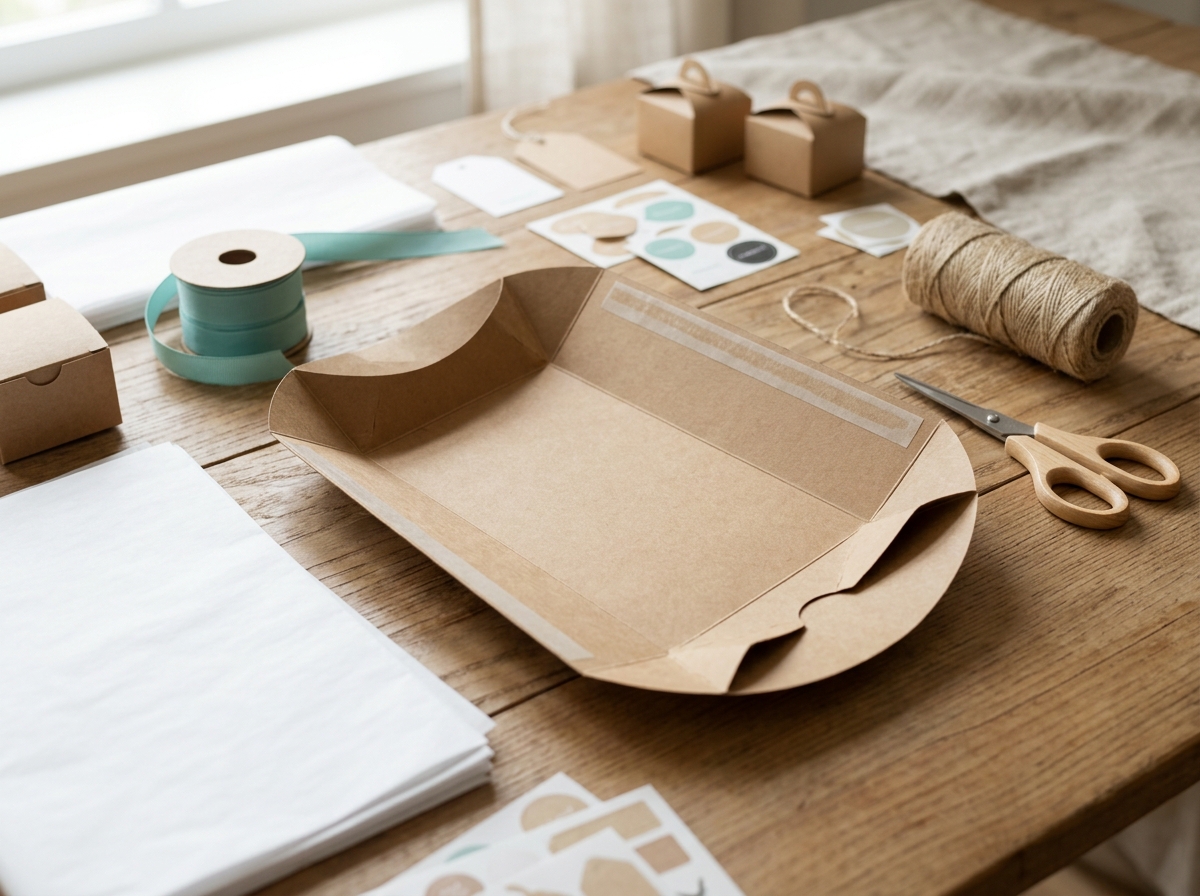
Once you have your materials gathered, the actual assembly process moves quickly. Here's the complete sequence from flat template to finished box.
Step 1: Cut your template. If you're working from a downloaded or printed template, cut along the solid outer lines. If you're hand-drawing your template, create a rectangle for the body (dimensions depend on your desired box size) with semicircular or curved flaps extending from the short ends. The flaps should measure roughly one-third to one-half the width of the body rectangle.
Step 2: Score the fold lines. Use a bone folder and ruler to score along all fold lines—this includes the edges where the flaps meet the body and any vertical seams. Scoring prevents the paper from cracking when you fold it and creates crisp, professional-looking creases. If your template has a side seam tab, score that line as well.
Step 3: Create the tube. If your template includes a side tab, apply glue or double-sided tape to the tab and attach it to the opposite edge, forming a tube. Let this dry completely before proceeding. Some templates come pre-glued; in that case, simply pop the flat piece into its tube shape.
Step 4: Fold the flaps. Gently push in the center of each curved end, folding the flaps inward. The curves should meet in the middle, overlapping slightly to create the pillow shape. The natural tension of the paper holds the flaps closed—no tape or glue required.
Step 5: Fill and seal. Before closing both ends completely, insert your gift through one open end. Small items like jewelry, candies, or gift cards work best. Once filled, fold the second end closed using the same technique.
The entire process—from flat template to filled box—genuinely takes five minutes or less once you've completed your first few practice rounds. The simplicity makes pillow boxes ideal for last-minute gift packaging or high-volume party favor assembly.
Pillow boxes work best for relatively flat, lightweight items. The curved closure creates less vertical space than a traditional box, so bulky or heavy objects may not fit comfortably or may cause the flaps to pop open.
Small pillow boxes (2" × 3" to 3" × 4"): Perfect for jewelry, earrings, small candies, gift cards, or tea bags. These miniature versions make excellent wedding favor boxes or place card holders.
Medium pillow boxes (4" × 6" to 5" × 7"): The most versatile size, suitable for cookies, soap bars, sachets, small toys, or cosmetic samples. This is the sweet spot for most gift-giving occasions.
Large pillow boxes (6" × 9" and up): Can accommodate scarves, small clothing items, multiple treats, or gift sets. Larger boxes require heavier cardstock to maintain structure.
When designing your own template, remember that the body width becomes the box's length, while the body height determines how much the box can expand. The flap size controls how securely the box closes—flaps that are too small won't meet in the middle, while oversized flaps become bulky and difficult to tuck.
For items that need more structured protection than a pillow box provides, consider alternatives like a white gift tuck top box that offers cube stability with similar quick-assembly convenience.
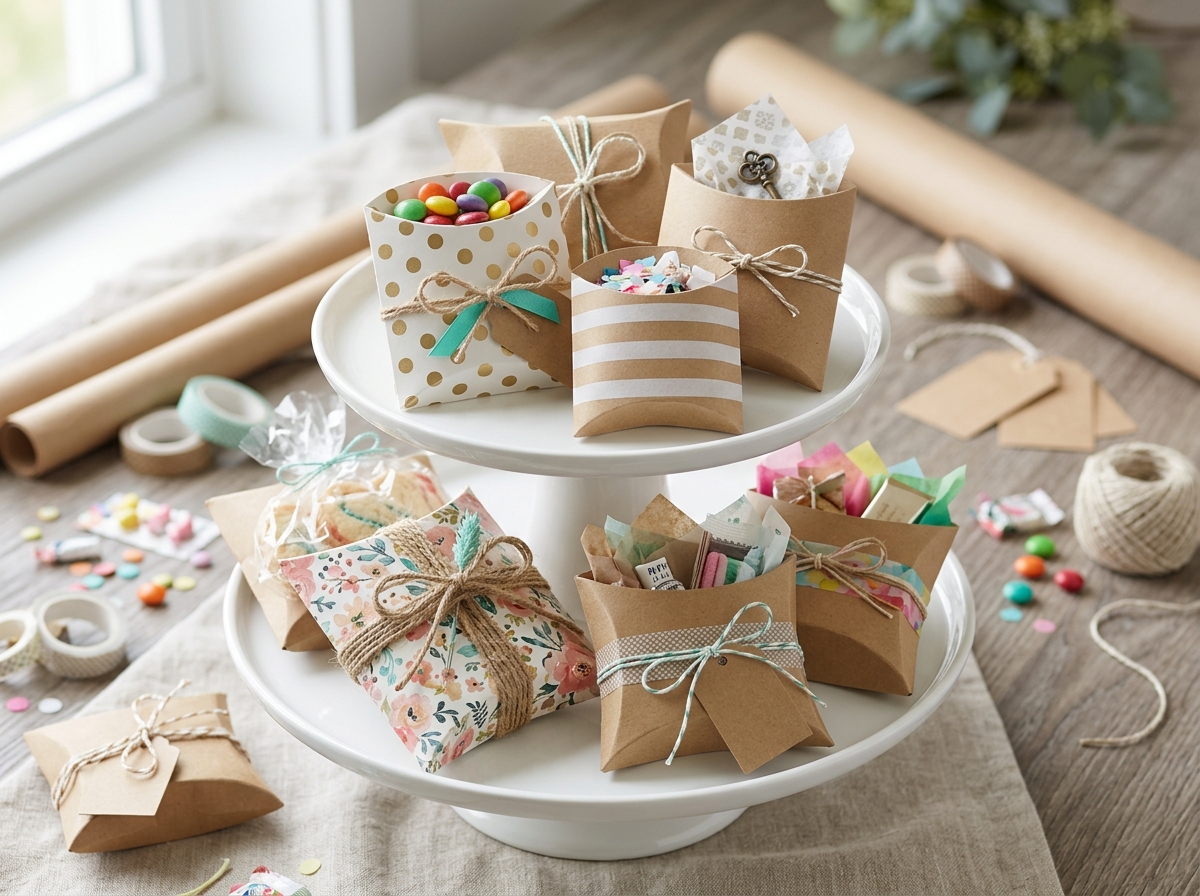
The smooth, curved surface of a pillow box serves as an ideal canvas for decoration. Because the shape itself is already visually interesting, even minimal embellishment creates an elevated look.
Pre-assembly decoration: The easiest time to add designs is while the template is still flat. Stamp patterns, apply printed labels, or use markers to add hand-lettering before you fold the box. This approach ensures clean, even coverage without wrestling with the curved shape.
Post-assembly options: Once assembled, you can tie ribbon around the center of the box (perpendicular to the length), attach a gift tag to one of the curved ends, or apply dimensional stickers or wax seals. Ribbon is particularly effective because it naturally follows the pillow box's curves and adds a finishing touch that looks intentional and polished.
Themed decoration ideas: For weddings, use white or ivory cardstock with gold wax seals and calligraphy name tags. For holidays, choose seasonal colors and patterns—red and green for Christmas, pastels for Easter, orange and black for Halloween. For birthdays, match the box color to the party theme and add confetti or coordinating tissue paper inside.
According to Flexible Packaging Association research, consumers increasingly value packaging that feels personalized and thoughtful, making decorated pillow boxes an effective way to elevate perceived gift value without significant cost.
If you're creating pillow boxes for a small business, consider having your logo printed on blank templates or using custom stamps to brand each box. This level of detail transforms simple packaging into a memorable unboxing experience that customers associate with your brand.
Even with a straightforward design, a few common pitfalls can compromise your finished pillow box. Here's what to watch for and how to correct issues.
Problem: Flaps won't stay closed. This usually means the flaps are cut too small or the box is overfilled. Solution: Ensure your template's flaps extend at least one-third the width of the body. If the box is overfilled, remove some contents or size up to a larger template.
Problem: Paper cracks along fold lines. This happens when you skip the scoring step or use paper that's too heavy for the design. Solution: Always score before folding, and test your paper weight with a single prototype before cutting multiple templates.
Problem: Box won't hold its pillow shape. The paper may be too lightweight or too stiff. Solution: Medium-weight cardstock (65-80 lb) provides the best balance of flexibility and structure. If you're committed to a particular paper, try adding a second layer or switching to a smaller box size.
Problem: Side seam keeps popping open. The glue hasn't fully dried or wasn't applied evenly. Solution: Use a strong adhesive (glue stick or double-sided tape works well) and allow several minutes for it to set before manipulating the box. Applying gentle pressure along the seam while it dries helps create a stronger bond.
Problem: Boxes look homemade in a bad way. Uneven cutting or messy fold lines create an amateur appearance. Solution: Use a paper trimmer or craft knife with a ruler for straight edges, score all folds with a bone folder, and work on a clean surface. Consistency matters more than perfection—if all your boxes look the same, they'll read as intentionally handmade rather than carelessly constructed.
The versatility of pillow box diy projects means they adapt beautifully to virtually any gift-giving scenario. Here's how to tailor them for specific events.
Weddings: Pillow boxes make elegant favor containers for Jordan almonds, chocolate truffles, or small succulents. Choose colors that match your wedding palette and add personalized tags with the couple's names and wedding date. For a cohesive look, coordinate pillow boxes with other wedding gift box elements.
Baby showers: Soft pastels or gender-neutral kraft work well for baby shower favors. Fill with candies, bath products, or small toys. Add a "thank you" tag and perhaps a ribbon in the shower's theme color.
Holidays: Christmas pillow boxes in red, green, or kraft with twine and evergreen sprigs create a rustic holiday aesthetic. For more elaborate holiday packaging, explore DIY Christmas gift boxes that coordinate with pillow box designs.
Birthdays: Match the pillow box to the birthday person's favorite color or the party theme. These work particularly well for party favors filled with candy or small toys. Kids especially enjoy pillow boxes because the shape feels special and different from standard gift bags.
Business gifts: Kraft pillow boxes with minimal branding create a sophisticated look for corporate thank-you gifts or client appreciation items. Include business cards, promotional items, or gourmet treats. The understated elegance signals thoughtfulness without appearing overly promotional.
Everyday gifting: Pillow boxes transform ordinary moments into special ones. Use them for "just because" gifts, teacher appreciation, hostess presents, or any time you want to show someone you care with a small, thoughtfully packaged token.
You don't need to be a designer to create professional-looking pillow boxes. Numerous free and paid template resources exist online, and many allow customization for your specific needs.
Free printable templates: Craft blogs and DIY websites offer downloadable pillow box templates in various sizes. These typically come as PDF files that you print on your home printer, then cut and fold. Search for "pillow box template free printable" to find options. For a broader selection of box templates, check out free printable gift box templates that include pillow box variations alongside other styles.
Customizable templates: Design software like Canva or Adobe Illustrator includes pillow box templates that you can resize and customize with your own colors, patterns, or text before printing. This approach works well if you want branded boxes for a business or event-specific designs.
Die-cutting machine files: If you own a Cricut, Silhouette, or similar cutting machine, you'll find pillow box designs in the machine's design library or from third-party designers. These files automate the cutting process and ensure precise, consistent results across multiple boxes.
Hand-drawn templates: For a truly custom size, you can draw your own template using the basic pillow box structure: a rectangle for the body with semicircular flaps on the short ends and a narrow tab on one long edge for the seam. Graph paper helps keep proportions accurate.
Whichever template source you choose, make a test box first. Print or cut one template, assemble it, and check that the size and proportions work for your intended contents before producing multiple boxes.
Pillow boxes occupy a specific niche in the gift packaging landscape. Understanding how they compare to other options helps you choose the right format for each situation.
Pillow boxes vs. gift bags: Pillow boxes feel more substantial and finished than paper gift bags, but they accommodate less volume. Choose pillow boxes for smaller, flatter items where presentation matters, and gift bags for larger or irregularly shaped gifts.
Pillow boxes vs. traditional boxes: Standard rectangular boxes offer more interior space and better protection for fragile items, but they require more complex assembly and often need tape or glue. Pillow boxes win for speed and simplicity when structural protection isn't the primary concern.
Pillow boxes vs. cellophane bags: Clear cellophane showcases the gift inside, making it ideal for visually appealing items like cookies or bath products. Pillow boxes create more mystery and anticipation because the contents remain hidden until opened. Both work well for party favors; choose based on whether you want to highlight or conceal the gift.
Pillow boxes vs. origami boxes: Origami gift boxes require no template and use only folding techniques, which makes them extremely portable and spontaneous. However, they demand more skill and time than pillow boxes. Pillow boxes offer a middle ground between the convenience of pre-made boxes and the handmade charm of origami.
For jewelry, small gift boxes in various styles provide additional options worth considering alongside pillow boxes.
If you need dozens or hundreds of pillow boxes for a wedding, corporate event, or small business, efficiency becomes crucial. Here's how to streamline bulk production.
Invest in pre-cut templates. Rather than cutting individual templates, order pre-made pillow boxes that arrive flat and ready to assemble. This eliminates the most time-consuming step and ensures consistency across all boxes. Many wholesale packaging suppliers offer pillow boxes in bulk at reasonable per-unit costs.
Use a die-cutting machine. If you're committed to DIY but need volume, a personal die-cutting machine can cut dozens of templates in the time it takes to hand-cut a few. The upfront investment pays off quickly if you make pillow boxes regularly.
Create an assembly line. If you're folding and decorating multiple boxes, set up stations for each task: cutting, scoring, gluing seams, decorating, and final assembly. Work through one step for all boxes before moving to the next. This batch processing approach is significantly faster than completing one box at a time.
Decorate before assembly. Stamp, print, or embellish flat templates before folding them. This allows you to work quickly without navigating the three-dimensional form.
Consider professional printing. For business applications or large events, local print shops or online services can print custom designs on pillow box templates. While this adds cost, it creates a polished, branded result that's difficult to achieve with home printing.
Small businesses looking for comprehensive packaging strategies should explore gift box packaging ideas for small business owners that address both DIY and ready-made options.
As environmental consciousness grows, many crafters and businesses seek packaging solutions that minimize waste and environmental impact. Pillow boxes can be surprisingly eco-friendly when you make intentional material choices.
Choose recycled paper. Kraft paper and recycled cardstock offer the same structural properties as virgin paper while reducing resource consumption. Many craft suppliers now clearly label recycled content percentages.
Avoid plastic embellishments. Skip plastic ribbons, synthetic stickers, or laminated finishes in favor of natural twine, paper tape, or plant-based decorations. These choices ensure the entire box can be recycled or composted.
Use vegetable-based inks. If you're printing custom designs, specify soy or vegetable-based inks rather than petroleum-based alternatives. This makes the paper easier to recycle and reduces chemical exposure.
Size appropriately. Making boxes that fit your gifts properly reduces paper waste and eliminates the need for excessive filler material. A well-sized pillow box often needs no additional cushioning.
Encourage reuse. Pillow boxes are durable enough to be reused if they're opened carefully. Include a note encouraging recipients to reuse the box for their own gift-giving, extending its useful life beyond a single use.
The minimal material requirements and lack of adhesive closures make pillow boxes inherently more sustainable than many packaging alternatives. A single sheet of paper becomes a functional, attractive container without additional components.
The cost per pillow box depends on your material choices and whether you're using free templates or purchased supplies. Using basic cardstock from a craft store, each medium-sized pillow box costs approximately 10-25 cents in materials. If you purchase pre-cut pillow box templates in bulk, the per-unit cost drops to 15-40 cents depending on quantity and quality. Adding decorations like ribbon or stamps increases the cost by 5-25 cents per box. Overall, homemade pillow boxes cost significantly less than purchasing pre-made gift boxes while offering more customization options.
Pillow boxes can hold food items, but you need to use food-safe paper and take appropriate precautions. For dry items like cookies, candies, or popcorn, line the pillow box with food-grade parchment paper or place items in a small cellophane bag before inserting them into the box. Avoid using pillow boxes for items that are greasy, moist, or require refrigeration, as the paper construction doesn't provide adequate protection or barrier properties. Always check that your paper stock is labeled food-safe if it will have direct contact with edible items.
Medium-weight cardstock between 65-80 lb provides the ideal balance for most pillow box applications. This weight is sturdy enough to hold its shape and protect contents, yet flexible enough to fold cleanly along the curved flaps without cracking. Lighter paper (20-50 lb) works only for very small pillow boxes or decorative uses where the box won't need to support any weight. Heavier cardstock (100 lb and above) is appropriate for large pillow boxes or items that need extra protection, though it requires careful scoring to fold properly.
If your pillow box flaps won't stay closed, first check that the flaps are large enough—they should extend at least one-third to one-half the width of the box body and overlap slightly when folded. Avoid overfilling the box, as too much content creates outward pressure that forces flaps open. Using paper with appropriate weight and stiffness helps the flaps maintain tension. For extra security, you can tie a ribbon around the center of the box perpendicular to its length, which holds flaps in place while adding decoration. Small adhesive dots on the flap tips also work for gifts that need to stay sealed during transport.
Yes, you can create pillow boxes without a formal template by hand-drawing the basic shape on cardstock. Draw a rectangle for the body in your desired dimensions, then add semicircular or curved flaps to each short end. The flaps should measure roughly one-third to one-half the width of the body. Add a narrow tab (about 0.5 inches) to one long edge for the glue seam. Score and fold along the lines where flaps meet the body and where the tab attaches. While a template ensures consistency across multiple boxes, hand-drawing works well for one-off projects or when you need a custom size not available in standard templates.
Whether you're packaging jewelry for bridesmaids, creating party favors for a milestone birthday, or adding a special touch to everyday gifts, pillow box diy projects deliver professional-looking results with minimal time investment. The combination of simple construction, elegant appearance, and versatile applications makes pillow boxes a valuable addition to any crafter's repertoire. With just paper, a template, and five minutes, you can transform ordinary gifts into memorable presentations that recipients will appreciate long before they discover what's inside.