Cart
0
You may also like

Book a call with our development team to get started.



Apply online and access wholesale pricing.

An origami gift box offers a sustainable, customizable way to package small gifts using nothing more than paper and precise folds. Unlike traditional boxes that require glue, tape, or assembly hardware, origami boxes rely entirely on folding techniques—making them ideal for last-minute gifts, eco-conscious crafters, and anyone who enjoys hands-on projects. The basic technique takes about 10-15 minutes to master and requires only two square sheets of paper: one for the base and a slightly larger one for the lid.
This guide walks through no-glue folding methods, paper selection by weight, and practical applications. For crafters planning DIY gift boxes in larger quantities or needing more structural support, we'll also cover when ready-made options make better sense.
The most common origami gift box design is the masu box—a traditional Japanese square container with a separate lid. The construction relies on a grid of creases that collapse into four walls and a flat base. Because the lid must fit over the base, you'll fold it from a sheet that's approximately 5-10% larger than the base sheet. For example, if your base uses a 15 cm × 15 cm square, your lid should start from a 16 cm × 16 cm square.
The folding sequence begins with creating diagonal and perpendicular creases that divide the paper into sections. These initial folds serve as guidelines for the corner folds that eventually form the box walls. The key to a sturdy, well-fitting box lies in crisp, accurate creases—each fold should be pressed firmly along its entire length to create a sharp edge that holds its shape under the weight of small gifts.
Most origami boxes are sized for jewelry, candies, or small trinkets. A 15 cm starting square typically yields a finished box measuring roughly 5 cm × 5 cm × 3 cm. Scaling up requires proportionally heavier paper to maintain structural integrity, which we'll address in the paper weight section.
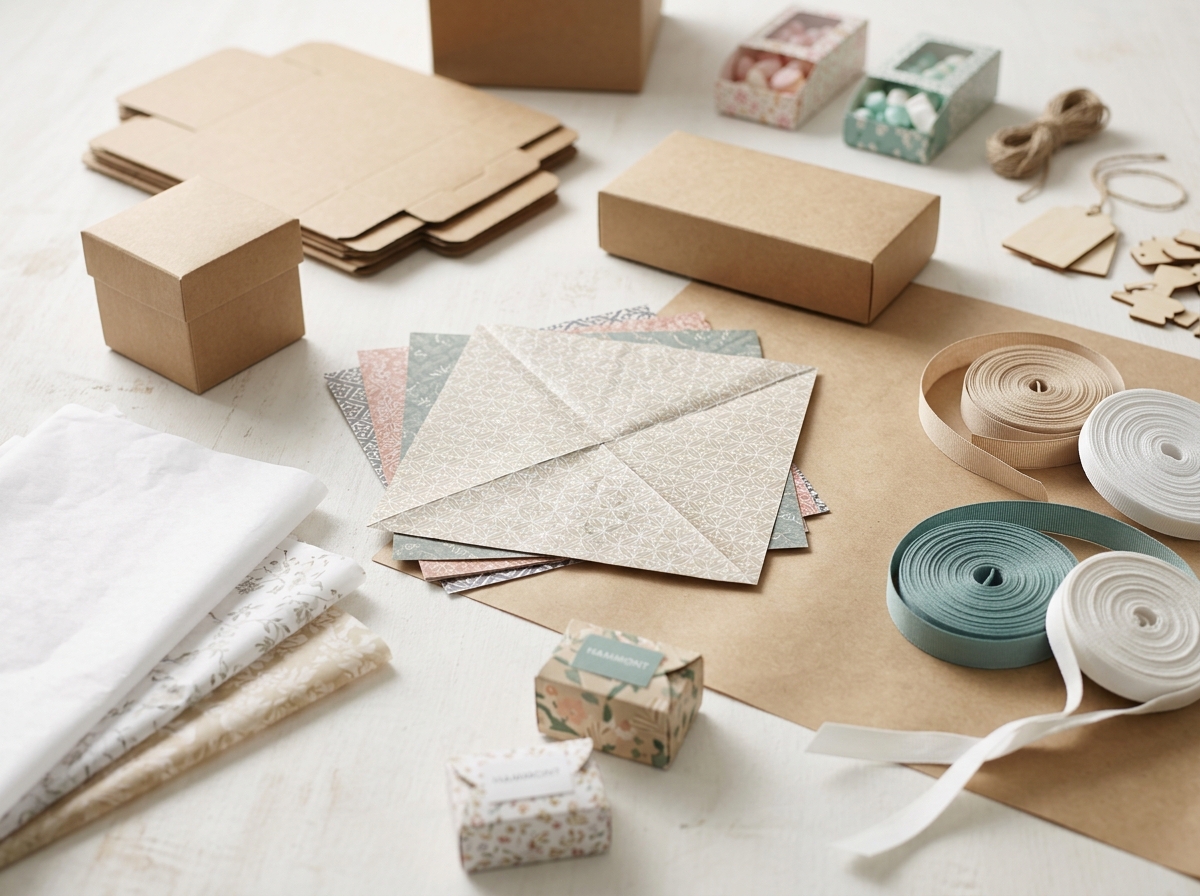
Paper weight, measured in grams per square meter (GSM), directly affects how well an origami gift box holds its shape. Origami.me notes that standard printer paper sits around 90-100 GSM, while business card stock reaches 350-400 GSM. For functional gift boxes, the ideal range falls between these extremes.
Lightweight paper (60-80 GSM) works well for small decorative boxes that will hold items under 50 grams—think earrings, folded cash, or a few wrapped candies. This weight allows for clean folds without excessive bulk at the corners, where multiple layers overlap. Standard origami paper (kami) typically falls in this range and comes pre-cut in squares, making it convenient for beginners.
Medium-weight paper (80-100 GSM) offers more versatility. It's sturdy enough to support slightly heavier contents—small cookies, bath salts in a sealed bag, or stacked chocolate squares—while remaining foldable without scoring. Copy paper and lightweight cardstock both work in this category, and you can source them in larger sheets if you need boxes bigger than the standard 15 cm square.
Heavy paper (100+ GSM) becomes necessary for boxes larger than 8 cm per side or when the contents exceed 100 grams. At this weight, you may need to score fold lines with a bone folder or the back of a butter knife to achieve clean creases. The trade-off is increased durability: these boxes can be opened and closed multiple times without losing their shape, making them suitable for reusable packaging.
Material texture also matters. Smooth, coated papers produce the sharpest creases and slide together easily during assembly, but they're more prone to slipping open if the fit isn't tight. Textured papers like kraft or linen-finish cardstock grip better and add visual interest, though they require more pressure to crease cleanly. For gift presentation, many crafters pair a decorative patterned paper for the lid with a solid coordinating color for the base.
Start with your base sheet, colored or patterned side facing down. Fold the paper in half diagonally to form a triangle, crease firmly, then unfold. Repeat with the opposite diagonal to create an X-shaped crease pattern. Next, fold the paper in half horizontally, crease, and unfold; repeat vertically. Your sheet now has a grid of intersecting creases marking the center point.
Bring one corner to the center point, crease the fold, then unfold. Repeat with all four corners—this step establishes the box's wall height. Now fold each edge to meet the nearest crease line you just made, creating a smaller grid. Unfold completely. Your paper should show a lattice of creases dividing it into a 4 × 4 grid.
Cut or tear along two opposite edges from the outer edge to the first crease line—this creates flaps that will tuck into the box walls. Fold up two opposite sides along the crease lines, bringing the walls to a 90-degree angle. The corner flaps will naturally angle inward. Fold the remaining two sides up and over, tucking the pointed flaps inside the box to lock the structure. Press all edges firmly to set the folds.
Repeat the entire process with your slightly larger lid sheet. The lid should fit snugly over the base without excessive force—if it's too tight, trim 1-2 mm from each edge of the lid sheet and refold. If it's too loose, start over with a sheet that's only 3-5% larger rather than 10%.
This basic technique adapts to rectangular boxes by starting with rectangular paper (maintaining the same length-to-width ratio for both base and lid). For deeper boxes, adjust the initial corner-to-center fold to bring corners only two-thirds of the way to center, which increases wall height at the expense of base width.
Once you've mastered the basic masu box, hinged-lid designs offer a more polished presentation. These boxes use a single sheet of paper folded to create both base and lid connected by a living hinge. The technique requires precise measurement: the paper must be divided into thirds lengthwise, with additional folds creating the depth. The result resembles a small treasure chest that opens and closes smoothly.
Hinged boxes work best with medium-weight paper (80-90 GSM) that's flexible enough to bend repeatedly without creasing the hinge area. They're particularly effective for small gift boxes containing jewelry or keepsakes, where the recipient might want to keep and reuse the packaging.
Modular origami boxes take a different approach: instead of folding a single sheet, you create multiple identical units that interlock without adhesive. A six-piece modular cube, for example, uses six squares folded into interlocking flaps. The assembly is more time-consuming—expect 30-45 minutes for your first attempt—but the finished box is remarkably sturdy and can be disassembled flat for storage.
These advanced techniques shine for special occasions when the packaging itself becomes part of the gift. However, they're impractical for bulk gifting or business use, where time and consistency matter more than novelty.
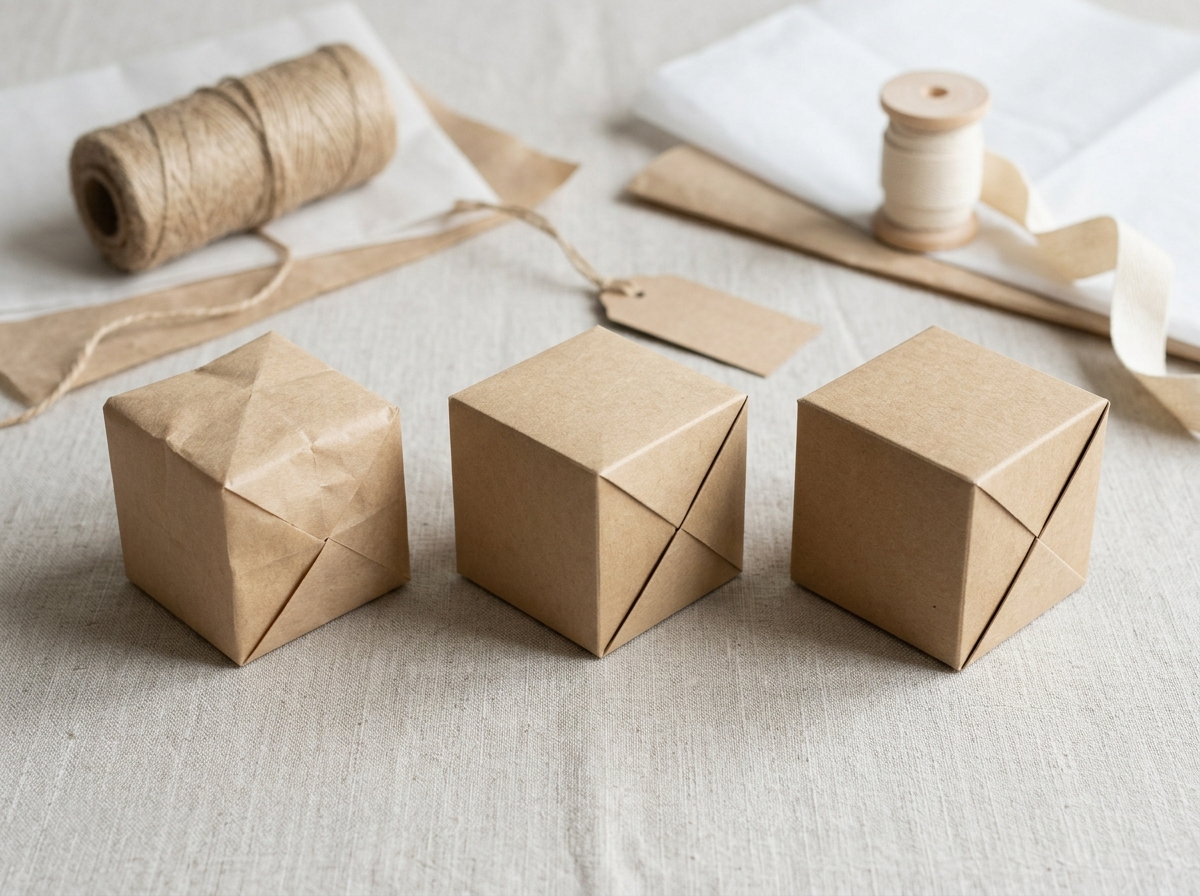
The beauty of origami boxes lies partly in their simplicity, but subtle embellishments can elevate them for special occasions. Since the boxes are already folded, decorations must be applied carefully to avoid disrupting the structure or preventing the lid from fitting properly.
Ribbon or twine wrapped around the closed box adds a classic touch—use a thin satin ribbon (3-6 mm wide) that won't add bulk. Thread it under the base and tie a bow on the lid, or wrap it around all four sides and tie at the top. For a more secure closure, punch a small hole through the center of the lid and base, then thread ribbon through both and tie inside the box.
Rubber stamps work well on origami boxes if applied before folding. Stamp your design in the areas that will become the lid top or box sides, avoiding crease lines where ink might crack. This technique is particularly effective for cardstock gift boxes where the paper weight can handle moisture from stamp ink without warping.
Washi tape—decorative Japanese masking tape—can reinforce corners or add color accents without the permanence of glue. Apply it along the outer edges of the lid or in strips across the box sides. Because washi tape is repositionable and low-tack, it won't tear the paper if you need to adjust placement.
For gift tags, punch a hole in one corner of the lid and attach a small card with string, or write directly on the box with a fine-point marker if you're using solid-colored paper. Avoid adhesive labels on textured paper—they often don't stick well and can peel off during handling.
Origami boxes excel as one-off projects or when the handmade aesthetic is part of the gift's appeal. They're sustainable—requiring only paper and producing no waste beyond scraps—and they allow complete creative control over size, color, and pattern. But they're not always the practical choice.
For events requiring more than a dozen boxes, the time investment becomes significant. Folding a single box takes 10-15 minutes for an experienced folder; multiply that by 50 wedding favors or 100 corporate gifts, and you're looking at 8-25 hours of folding. At that scale, cube kraft tuck-top boxes offer consistent sizing, faster assembly, and professional appearance at a lower effective cost when you factor in labor.
Structural limitations also come into play. Origami boxes larger than 10 cm per side require heavy cardstock that's difficult to fold cleanly, and even then, they lack the rigidity of die-cut boxes with reinforced corners. If your gift weighs more than 200 grams or has sharp edges that might puncture paper, a constructed box with a separate lid provides better protection.
Businesses that need branded packaging can't easily scale origami methods. While you can print on paper before folding, achieving consistent registration (alignment of printed elements with fold lines) across dozens of sheets requires specialized equipment. Pre-made boxes accept custom labels, stamps, or printed inserts more reliably, and they stack efficiently for storage—a consideration for retail environments with limited space.
That said, origami techniques and ready-made boxes aren't mutually exclusive. Many crafters use small white tuck-top boxes as inner packaging for delicate items, then nest them inside a larger origami box for presentation. This hybrid approach balances protection with handmade charm.
One of origami's strongest selling points is its minimal environmental footprint. A single sheet of paper, folded and unfolded, returns to recyclable waste without adhesives or coatings to complicate processing. Clemson University research into sustainable packaging emphasizes that paper-based solutions, when sourced responsibly, offer significant advantages over plastic alternatives in terms of biodegradability and recycling infrastructure compatibility.
Choosing paper for origami boxes involves trade-offs. Recycled paper stocks reduce virgin fiber demand but often have shorter fibers that produce weaker creases. FSC-certified paper ensures responsible forestry practices but typically costs 15-30% more than conventional paper. For gift-givers prioritizing sustainability, the calculus depends on whether the box will be kept, reused, or recycled after a single use.
Origami boxes made from high-quality paper can be flattened and stored for reuse, extending their functional life beyond typical single-use packaging. Recipients who appreciate the craft often keep them for organizing small items—buttons, jewelry, office supplies—which delays or eliminates their entry into the waste stream. This reusability factor, combined with the lack of adhesives, makes origami boxes genuinely eco-friendly when the paper itself is responsibly sourced.
However, scale matters. A single crafter folding boxes for personal gifts has negligible environmental impact compared to a business ordering thousands of boxes. At commercial volumes, the energy and material efficiency of industrial box manufacturing—which optimizes paper usage through precise die-cutting and minimizes waste—often results in a lower per-unit carbon footprint than hand-folding, even when factoring in transportation. The most sustainable choice depends on context: origami for small-scale, personal gifting; manufactured boxes for bulk needs.
Boxes that won't stay closed typically suffer from one of two issues: the lid is too large, or the paper is too lightweight for the box size. If your lid slides off easily, remake it with a sheet only 3-5% larger than the base rather than 10%. If the paper is the issue, switch to a weight at least 10 GSM heavier—the added stiffness will help walls stand upright and lids grip more firmly.
Corners that bulge or won't lie flat indicate incomplete creasing. Origami requires sharp, precise folds pressed along their entire length. Use a bone folder, the edge of a ruler, or your fingernail to burnish each crease after folding. Pay special attention to the corners where multiple layers meet—these areas need extra pressure to compress neatly.
Boxes that collapse under the weight of their contents are either too large for the paper weight or have walls that aren't perpendicular to the base. Check that your initial grid folds are accurate—if the creases don't intersect at perfect right angles, the walls will lean and weaken the structure. For heavy contents, switch to 100+ GSM paper or consider a smaller box size.
Lids that are too tight and tear the box edges when removed suggest your measurements are off. The lid sheet should be 5-10% larger in each dimension, not in total area. For a 15 cm base sheet, use a 15.75-16 cm lid sheet, not an 18 cm sheet. Small adjustments make a significant difference in fit.
Wedding favors benefit from origami boxes in soft, romantic colors—blush pink, ivory, or sage green. Fill them with Jordan almonds, personalized chocolates, or small packets of wildflower seeds. The boxes double as place cards if you write guests' names on the lids, and their uniform size makes table arrangement straightforward. For weddings requiring 100+ favors, consider using printable gift box templates that allow you to print names or monograms directly on the paper before folding.
Holiday gifting suits origami boxes folded from seasonal paper—snowflakes, holly patterns, or metallic gold and silver. They're ideal for homemade cookies, fudge, or small ornaments. Stack several boxes in graduating sizes and tie them together with ribbon for a tiered presentation. For Christmas gift packaging, origami boxes offer a handmade touch that complements other DIY elements like hand-lettered tags or dried orange slice decorations.
Corporate gifts present a challenge for origami boxes due to branding requirements and the need for consistency across large quantities. Small businesses might fold 20-30 boxes for client gifts, using solid-colored paper and affixing custom labels or wax seals to the lids. Beyond that volume, the time investment becomes prohibitive, and ready-made boxes with printed inserts or belly bands deliver a more professional appearance.
Children's parties are where origami boxes shine. Kids can fold their own take-home boxes as a party activity, decorating them with stickers or markers before filling them with candy. Use bright, patterned paper and keep the box size small (8 cm or less per side) so young folders can complete them successfully. For very young children, pre-fold the boxes and let them decorate the finished products.
A basic masu box takes 10-15 minutes for someone with moderate folding experience. Complete beginners should expect 20-25 minutes for their first attempt as they learn the crease pattern. Hinged boxes and modular designs take 30-45 minutes. The time decreases significantly with practice—experienced folders can complete a simple box in under 5 minutes. For events requiring multiple boxes, factor in 15 minutes per box for planning purposes.
For a finished box measuring approximately 3 inches (7.6 cm) square, start with a 9-inch (23 cm) square for the base and a 9.5-inch (24 cm) square for the lid. The general rule is that your starting paper should be roughly three times the desired finished box dimension. Always cut your lid sheet 5-10% larger than your base sheet to ensure proper fit. If you're using centimeter measurements, a 23 cm base and 24 cm lid will yield a box close to 7.5 cm finished size.
Yes. Standard copy paper, scrapbook paper, wrapping paper, and even magazine pages work for origami boxes, though results vary by paper weight and texture. Copy paper (80-90 GSM) folds cleanly and holds its shape well for small to medium boxes. Wrapping paper is often too thin (40-50 GSM) for structural boxes but works for decorative, lightweight applications. Scrapbook cardstock (100-110 GSM) is ideal for larger or sturdier boxes. The key is choosing paper that's thick enough to support your intended contents but thin enough to fold without cracking.
Increase sturdiness by using heavier paper (90-110 GSM instead of 60-80 GSM), ensuring all creases are sharp and fully pressed, and sizing the lid for a snug fit that holds the box closed. For boxes that will hold heavier items, reinforce the base by inserting a cardboard square cut to fit inside the bottom before adding contents. You can also apply a light coat of clear acrylic sealer to the finished box, which stiffens the paper slightly and makes it more resistant to moisture and handling.
Origami boxes work for mailing only if placed inside a protective outer box or padded envelope. The folded structure isn't designed to withstand compression or impact during shipping. If you want to mail a gift in an origami box, nest it inside a slightly larger shipping box with cushioning material (bubble wrap, crinkle paper, or air pillows) to prevent crushing. For direct mailing without additional packaging, use constructed boxes with reinforced corners and edges instead.