Cart
0
You may also like


Book a call with our development team to get started.



Apply online and access wholesale pricing.

Budget-conscious home bakers don't need expensive custom boxes to create memorable cookie gifts. With clear cellophane bags, a few spools of ribbon, and printable labels, you can elevate simple packaging into something that looks professionally crafted—without the wholesale minimums or lead times. This guide walks through practical DIY cookie packaging techniques that balance presentation with cost, from ribbon-tie closures to cupcake liner inserts that add structure and visual appeal.
Whether you're preparing for a cookie exchange party or packaging holiday treats for neighbors, these methods work for batches of any size and require only materials you can pick up at a craft store or order in small quantities online.
Clear cellophane bags offer home bakers three advantages that rigid boxes can't match at the same price point: visibility, versatility, and per-unit cost. When shoppers or gift recipients can see the cookies inside, the product sells itself—no need for expensive printed graphics. A stack of chocolate chip cookies or decorated sugar cookies becomes the design element.
From a practical standpoint, cellophane bags accommodate irregular shapes more gracefully than boxes. Thick, chunky cookies, delicate lace tuiles, or oversized decorated rounds all fit without the Tetris puzzle of box sizing. And because bags conform to their contents, you avoid the "half-empty box" problem that can make a dozen cookies look sparse.
Cost matters for home bakers working without wholesale accounts. Clear cellophane bags in standard sizes typically run 15 to 30 cents per bag in small-pack quantities—a fraction of the cost of even basic bakery boxes. For a cookie exchange where you're packaging 12 to 20 individual portions, that difference adds up.
The FDA regulates food packaging materials to ensure safety, and Plastics Industry Association notes that food contact substances must meet premarket approval standards. When sourcing cellophane or polypropylene bags for cookies, confirm they're labeled food-safe—most retail packaging suppliers specify this, but it's worth verifying if you're buying from a general craft source.
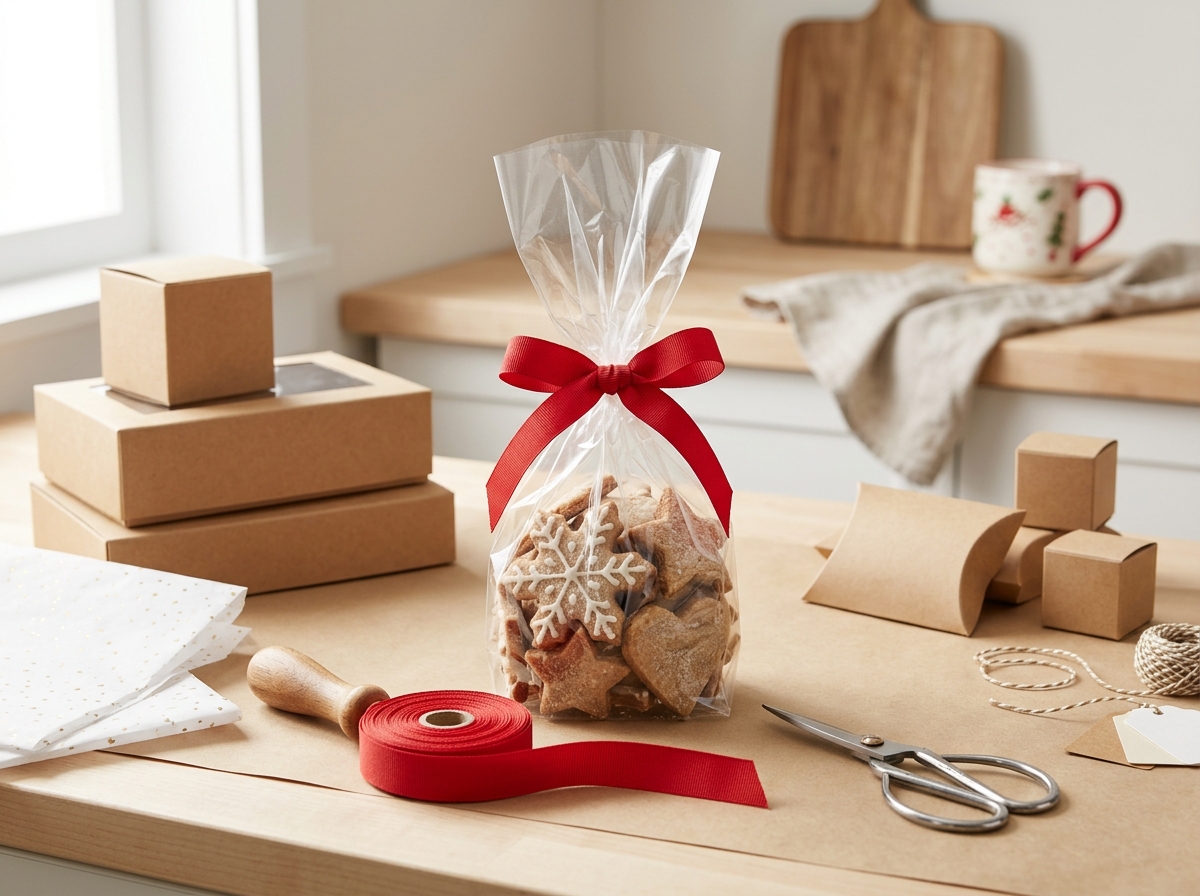
A ribbon tie serves two functions: it seals the bag and transforms plain packaging into something gift-worthy. The simplest method—gathering the bag top and tying a bow—works for most cookie shapes, but a few refinements make the difference between "homemade" and "handcrafted."
After filling the bag, leave 2 to 3 inches of headspace above the cookies. Gather the bag opening and twist it twice to create a neck. Wrap your ribbon around the twist, tie a knot, then finish with a bow. This technique keeps the seal tight and positions the bow at the natural focal point. For cookies that need to stay fresh for several days, add a small piece of clear tape at the twist before tying the ribbon—it's invisible but prevents the bag from unraveling if the bow loosens.
Combine two materials for visual depth: tie the bag with natural jute twine first (it's strong and inexpensive), then layer a narrower satin or grosgrain ribbon over it. The twine provides structure; the ribbon provides polish. This approach works especially well for rustic or farmhouse-style presentations where you want texture without looking overly formal.
If you're packaging 20 or 30 bags for a cookie exchange, cut all your ribbon lengths in advance. Measure one test bag to determine the right length (typically 18 to 24 inches for a standard bow), then cut the rest assembly-line style. Pre-cutting saves time and ensures visual consistency across your batch.
Ribbon costs vary widely by material and width. Satin and grosgrain ribbons in 3/8-inch or 5/8-inch widths offer good coverage without overwhelming small bags. Craft stores often run seasonal sales where ribbon drops to 50 cents per yard—stock up during these windows if you bake regularly.
A printed label turns anonymous cookies into branded gifts. You don't need a graphic designer or commercial printer—free templates and home inkjet printers handle most home-baker needs. The key is choosing label stock that adheres well to cellophane without peeling or leaving residue.
Matte-finish sticker paper works better on cellophane than glossy stock. Glossy labels can slide or refuse to stick to the slick bag surface, especially in humid conditions. Avery, OnlineLabels, and similar brands offer inkjet-compatible matte label sheets in round, oval, and rectangular formats. Round labels in 2-inch or 2.5-inch diameters fit nicely on the front of a filled bag without covering too much of the cookie visibility.
At minimum, include the cookie flavor or name and your name or bakery name if you're building a side business. If the cookies contain common allergens—wheat, eggs, dairy, tree nuts, peanuts—list them. This isn't just good practice; in some jurisdictions, cottage food laws require allergen disclosure even for home-baked goods sold or given away. A "baked on" date helps recipients gauge freshness, especially for cookies with shorter shelf lives like those containing fresh fruit or cream cheese.
Design-wise, keep text large enough to read at arm's length—10-point type is the minimum, 12-point is safer. Use one or two fonts maximum. If you're creating a template you'll reuse, leave the flavor field blank and handwrite it with a fine-tip marker after printing. This lets you print one label design for multiple cookie varieties.
Canva offers free label templates sized for standard Avery sheets. Avery's own Design & Print tool provides templates matched to their product numbers. Both platforms let you add simple graphics—a rolling pin icon, a whisk illustration, or seasonal motifs like snowflakes or holly. Avoid clipart that looks dated; clean line drawings or minimal geometric shapes age better and photograph well for social media if you're building an online presence.
Label placement matters. Center the label on the front of the bag, just below the midpoint of the cookie stack. This position keeps the label visible when bags are displayed upright or laid flat. If you're adding a ribbon tie, place the label before tying—trying to apply a label over gathered cellophane creates wrinkles.
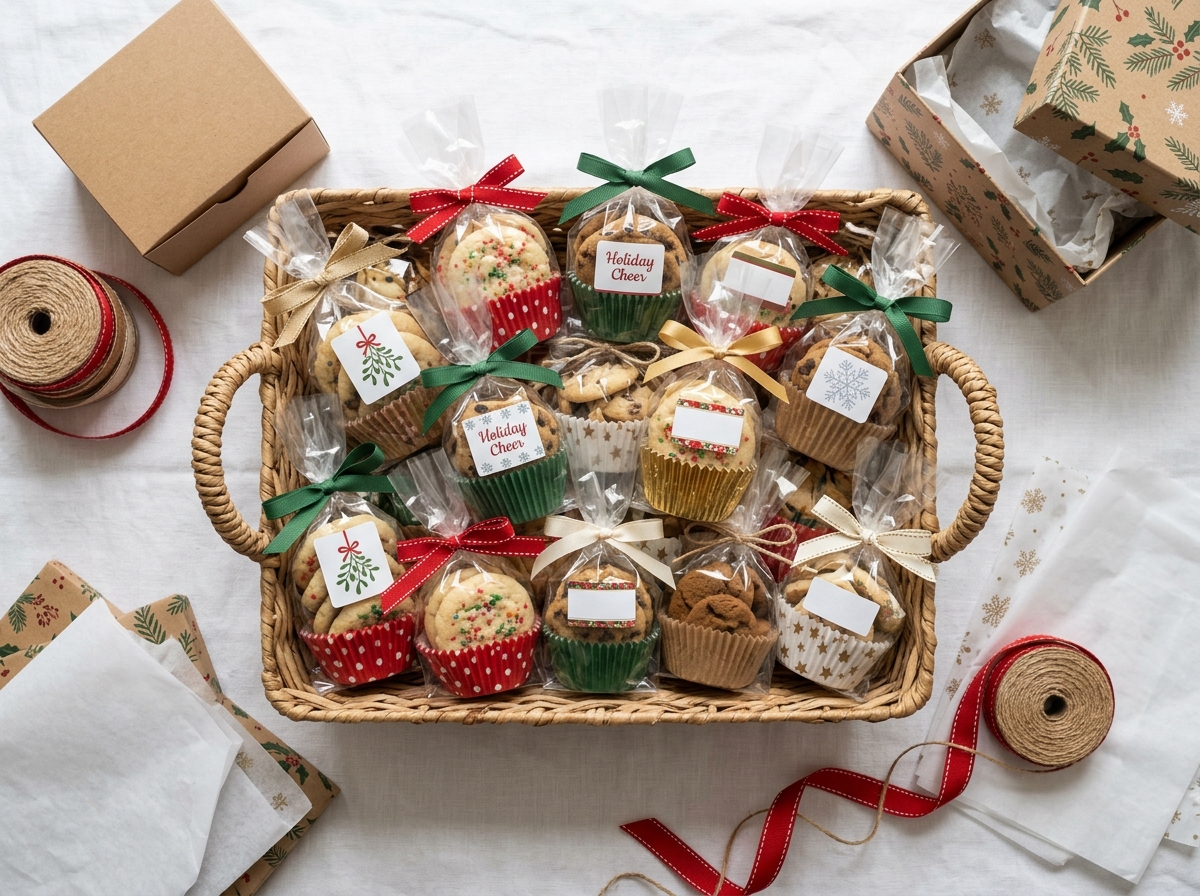
Cupcake liners aren't just for cupcakes. Placed at the bottom of a cellophane bag, a flattened liner creates a colorful base that frames the cookies and prevents them from sliding around. This trick is especially useful for round cookies like snickerdoodles or decorated sugar cookies, where you want to showcase the top surface.
Flatten a standard cupcake liner (the pleated paper kind, not foil) and slide it into the bag before adding cookies. The liner sits behind the cookies, visible through the clear bag, adding a pop of color or pattern. For holiday cookies, use liners in seasonal colors—red and green for Christmas, pastels for Easter, black and orange for Halloween. Patterned liners (polka dots, stripes, florals) work year-round and add visual interest without requiring printed bag designs.
This technique costs almost nothing—cupcake liners run about 3 to 5 cents each in bulk packs—but the effect is immediate. It's particularly effective for cookies that might otherwise look plain in a clear bag, like undecorated shortbread or peanut butter cookies. The liner provides a designed backdrop that makes the simplest cookies look intentional.
For stacked cookies, use two liners: one at the bottom and one midway through the stack. This creates visual separation and helps prevent cookies from shifting during transport. If you're packaging soft, chewy cookies that might stick together, the liner also acts as a barrier.
Decorated sugar cookies with royal icing or cookies with delicate edges benefit from individual wrapping before going into the cellophane bag. This prevents icing from smudging and keeps intricate edges intact. Wax paper works, but tissue paper looks more finished and comes in colors that coordinate with your overall presentation.
Cut tissue paper into 4-inch or 5-inch squares. Place one cookie in the center, fold the sides over like a parcel, and secure with a small sticker or piece of washi tape. Then slide the wrapped cookies into the cellophane bag. The tissue adds a layer of protection and creates a "gift within a gift" effect when the recipient opens the bag.
This method takes more time—plan about 30 seconds per cookie—but it's worth it for high-value presentations like wedding favors or premium holiday gifts. Tissue paper costs about 2 cents per sheet when bought in bulk packs of 100 or more.
If you're packaging cookies regularly—for a cottage bakery, a holiday cookie business, or frequent gifting—branded stickers add a professional touch that generic labels can't match. You have two paths: print your own on sticker sheets or order custom stickers from a print service.
Home inkjet printing works for small batches and lets you iterate on designs quickly. Use weatherproof or waterproof sticker paper if cookies might be refrigerated or exposed to condensation. Standard paper stickers can smudge or peel in humid conditions. Print a test sheet and let it sit overnight to ensure the ink fully dries—some inkjet inks remain tacky for hours after printing.
Services like Sticker Mule, StickerApp, or Vistaprint offer custom stickers with no minimum orders (or very low minimums like 10 or 25 pieces). Expect to pay $1 to $2 per sticker for small quantities, with per-unit costs dropping significantly at 100+ pieces. These services use professional printing methods (usually digital or offset) that produce more durable, vibrant stickers than home printing. Turnaround is typically 5 to 10 business days.
If you're testing a new cookie line or packaging design, start with DIY printing. Once you've settled on a look and are producing regularly, switch to a print service for better quality and time savings.
When you're combining ribbons, labels, and cupcake liners, a cohesive color palette prevents the packaging from looking chaotic. Choose two or three colors maximum and repeat them across elements. For example: kraft-colored labels, natural jute twine, and red gingham cupcake liners create a cohesive farmhouse look. Or: white labels with black text, black satin ribbon, and white polka-dot liners for a classic, elegant presentation.
Avoid mixing too many patterns. If your cupcake liners are patterned, keep the ribbon solid. If you're using patterned ribbon, use solid liners. One patterned element plus solid accents reads as intentional; multiple patterns compete for attention and can look cluttered.
Seasonal color schemes help cookies feel occasion-appropriate without requiring different packaging formats. Red and green immediately signal Christmas; pastels work for spring and Easter; orange and brown suit fall and Thanksgiving. If you're packaging year-round, stick to neutrals—kraft, white, black, natural twine—that work for any occasion.
Packaging 50 or 100 bags for a large cookie exchange or fundraiser requires a different workflow than packaging a dozen gifts. Set up an assembly line with stations for each step: filling, sealing, labeling, and tying. This method is faster and produces more consistent results than completing one bag at a time.
Station 1: Fill all bags with cookies and leave them open. Station 2: Apply labels to all bags. Station 3: Twist and tie all bags with ribbon. If you're working with a partner or family member, assign one person per station. Even working solo, batch-processing each step is more efficient than switching tasks repeatedly.
Pre-measure cookies into portion sizes before you start bagging. If each bag should contain six cookies, count out stacks of six and line them up on your work surface. This prevents miscounts and keeps bags uniform in size and fullness.
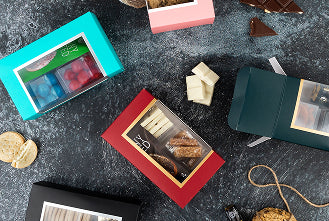
For very large batches, consider whether window boxes might be more efficient. Boxes require less hand-tying and can be faster to assemble at scale, though they cost more per unit. The break-even point depends on your time value and how much you're charging (if selling) or budgeting (if gifting).
Once your cookies are beautifully packaged, you need to get them to their destination without crushing bows or smudging labels. Flat-bottomed shopping bags or shallow cardboard boxes work better than deep totes. Arrange bags upright, standing on their ribbon-tied tops, so cookies stay level and ribbons don't get compressed.
If you're transporting bags in a car, place them in a single layer on the back seat or in a trunk organizer that prevents sliding. Stacking bags more than two deep risks crushing bottom layers. For longer trips or mailed gifts, place each cellophane bag inside a small cardboard box or padded mailer. The outer container protects the decorative packaging and prevents the ribbon from snagging.
Timing matters for cookies with limited shelf life. Package cookies as close to delivery time as possible—ideally within 24 hours. Soft cookies like molasses or ginger cookies can start to dry out even in sealed bags after a few days. If you must package in advance, store finished bags in an airtight container at room temperature (for most cookies) or refrigerate (for cookies with cream cheese or fresh fruit). Add a small silica gel packet to the storage container if you're in a humid climate, but don't put the packet inside the individual bags where it's visible.
Transparency about costs helps home bakers budget accurately and decide whether DIY packaging makes sense for their needs. Here's a realistic per-bag cost breakdown for a typical DIY cellophane bag setup:
Total per bag: $0.33 to $0.65 for a basic setup, or up to $1.00 if you're adding tissue wraps and premium ribbon. Compare this to pre-printed bakery boxes, which start around $0.75 to $1.50 per box for small quantities, or custom-printed bags at $1.50 to $3.00 each with minimum orders of 100 to 500 units.
For a home baker packaging 20 to 50 bags a few times per year, DIY is almost always more economical. For a cottage bakery producing hundreds of units monthly, the cost equation shifts—at that volume, wholesale bakery boxes or custom-printed bags may offer better per-unit pricing and faster assembly, even with higher upfront costs.
Cellophane bags aren't the right choice for every cookie or every occasion. Delicate, multi-layered cookies like macarons or sandwich cookies with filling are prone to shifting and breaking in bags. Cookies that need to stay completely flat—like intricately decorated sugar cookies with wet royal icing—risk smudging even with tissue wraps. In these cases, rigid boxes with inserts or dividers provide better protection.
Presentation expectations also matter. For upscale events—weddings, corporate gifts, high-end holiday parties—the "homemade" aesthetic of ribbon-tied bags may not match the formality of the occasion. In those contexts, a clean white or kraft box with a printed belly band or foil-stamped label reads as more premium, even if the actual product inside is identical.
Consider your distribution method, too. If you're handing cookies directly to recipients, bags work beautifully. If cookies are being shipped, stacked on a dessert table for hours, or transported by someone else, boxes offer more structural integrity and stacking stability.
The good news: you don't have to choose one format forever. Many home bakers keep both cellophane bags and a few sizes of boxes on hand, selecting the format that best fits each specific batch and occasion.
Standard cellophane bags are typically made from polypropylene (OPP), which is recyclable in some municipal programs but not compostable. If sustainability is a priority, several alternatives exist, though they come with trade-offs in cost and availability.
Compostable cellophane made from cellulose (plant-based) looks and functions similarly to OPP but breaks down in commercial composting facilities. These bags cost about 50% to 100% more than standard cellophane and are less widely available—you'll likely need to order online rather than picking them up at a local craft store. Brands like BioBag and If You Care offer food-safe compostable bags in various sizes.
Paper bags are another option, though they don't provide the same product visibility. Glassine bags—smooth, grease-resistant paper bags—work well for cookies and have a vintage aesthetic. They're opaque or translucent rather than clear, so you lose the "see the product" advantage, but they're fully recyclable and often compostable. Glassine bags cost roughly the same as standard cellophane.
For ribbons, cotton or linen twine is biodegradable and has a natural look that suits eco-conscious branding. Avoid synthetic satin or polyester grosgrain if compostability is a goal—these are plastic-based and won't break down. Jute, hemp, and cotton ribbons are all plant-based and compostable, though they're slightly more expensive than synthetic options.
Labels present a challenge: most sticker paper has a plastic-based adhesive that isn't compostable. Paper labels with natural gum adhesive exist but are harder to source for home printing. A workaround: use stamp-style labels (ink stamped directly onto the bag or onto a paper hang tag) or handwritten tags tied with twine. These methods take more time but avoid adhesive waste entirely.
If you're packaging cookies regularly—whether for a side business, frequent gifting, or social media content—developing a consistent visual style helps build recognition and perceived value. Choose a specific color palette, ribbon type, and label design, and use them every time. Consistency signals professionalism and makes your cookies instantly recognizable.
This doesn't mean every bag has to look identical. You can vary cookie flavors, seasonal colors, or label text while keeping core elements constant. For example: always use kraft labels with the same font and logo, but change the ribbon color by season. Or: always use natural jute twine, but swap cupcake liner patterns to match holidays.
Document your packaging process with photos at each step. This creates a reference for yourself (so you remember exactly how you did it six months later) and provides content for social media or a website if you're building a baking business. Process shots—bags being filled, ribbons being tied, finished stacks of packaged cookies—perform well on Instagram and Pinterest and help potential customers visualize the care that goes into your products.
If you're selling cookies, even informally, consistent packaging also simplifies inventory and ordering. You know exactly which supplies to restock and in what quantities, rather than buying different materials for each batch and ending up with a drawer full of half-used ribbon spools.
If you're giving cookies as gifts, labeling is optional (though helpful for allergen disclosure). If you're selling cookies—even casually at a bake sale or through social media—labeling requirements vary by state and sales volume. Most states have "cottage food laws" that allow home bakers to sell certain low-risk foods without a commercial kitchen license, but these laws typically require specific label information.
Common cottage food label requirements include: the product name, your name and home address, the statement "Made in a home kitchen," a list of ingredients in descending order by weight, and a list of major allergens. Some states also require net weight and a "not for resale" disclaimer. Check your state's cottage food law for exact requirements—the Packaging Digest and similar industry resources often cover regulatory updates, but your state's department of agriculture or health department website is the authoritative source.
Even if your state doesn't require allergen disclosure, it's good practice to include it. Allergic reactions are serious, and transparency builds trust with customers. If a cookie contains wheat, eggs, milk, peanuts, tree nuts, soy, fish, or shellfish (the FDA's "Big 8" allergens), list them clearly on your label.
For home bakers who aren't selling, these requirements don't apply—but the principles are still useful. A label that says "Contains: wheat, eggs, dairy, almonds" helps recipients make safe choices and shows you've thought about their needs.
Most cookies stay fresh in sealed cellophane bags for 3 to 5 days at room temperature. Package cookies as close to delivery time as possible for best quality. Crisp cookies like biscotti or shortbread hold up longer—up to a week—while soft cookies like chocolate chip or oatmeal raisin may start to dry out after 3 days. If you must package more than a day in advance, store finished bags in an airtight container to slow moisture loss. Avoid refrigerating packaged cookies unless they contain perishable ingredients like cream cheese, as refrigeration can make most cookies go stale faster.
Bag size depends on cookie dimensions and how you're stacking them. For standard 3-inch round cookies stacked flat, a 5" × 7" or 6" × 9" bag holds 6 to 12 cookies comfortably. Larger cookies (4 inches or more) or thicker cookies need 8" × 10" or larger bags. Leave 2 to 3 inches of headspace above the cookies for gathering and tying. If you're unsure, buy a variety pack of sizes and test with your actual cookies—bag sizes are inexpensive enough that a few trial runs won't break your budget.
Ribbon doesn't need to be food-safe because it doesn't contact the cookies directly—it only touches the outside of the cellophane bag. Any ribbon from a craft store works fine. That said, avoid ribbons with glued-on embellishments (like plastic gems or glitter) that might fall off and create a choking hazard, especially if you're packaging cookies for young children. Satin, grosgrain, jute, and cotton ribbons are all safe and widely available.
Sturdy cookies like shortbread, biscotti, or thick chocolate chip cookies travel well in cellophane bags with minimal precautions—just avoid overpacking the bag, which can cause cookies to press against each other and crack. For more delicate cookies, wrap each one individually in tissue paper or wax paper before placing in the bag. Transport bags upright in a flat-bottomed container so cookies don't shift. For mailed gifts, place the cellophane bag inside a rigid box with padding (crumpled paper or bubble wrap) to absorb shock during shipping.
Requirements vary by state and sales volume. Most states allow limited home-based food sales under cottage food laws without a commercial kitchen license, but you typically need to register with your state or local health department and follow specific labeling rules. Some states cap annual sales (often between $15,000 and $50,000) and restrict where you can sell (direct to consumer only, no wholesale or online sales in some states). Check your state's cottage food law or contact your local health department for specific requirements. Even if a license isn't required, liability insurance is a smart investment if you're selling food regularly.
The cookies you spent hours baking deserve packaging that matches that effort. DIY cookie packaging using clear cellophane, thoughtful ribbon ties, and custom labels transforms a simple gift into something memorable—without requiring a wholesale budget or commercial equipment. The techniques in this guide scale from a single batch for neighbors to a hundred bags for a fundraiser, and they work for bakers at any skill level.
Start with the basics: good-quality food-safe bags, ribbon in your chosen color palette, and simple printed labels. As you gain confidence, add layers like cupcake liner inserts, tissue wraps, or branded stickers. The key is consistency—when your packaging looks intentional and cohesive, recipients notice the care you've put into every detail, from the cookies themselves to the final bow.