Cart
0
You may also like


Book a call with our development team to get started.


Apply online and access wholesale pricing.
There’s nothing quite like seeing someone’s face light up when they unwrap a gift made specifically for them. Personalization—especially in the realm of gift-giving—is a sure-fire way to stand out and show you care. From weddings and baby showers to holidays and birthday gifts, there are plenty of ways to make your gift box shine.
Below, we’ll walk you through personalizing your gift box for every occasion, ensuring your gift leaves a lasting impression and is unlike any other!
Inevitably, the theme depends on the occasion and the recipient. Consider the person’s (or couple’s) interests, personality, or even current life circumstances. Are there ways to create an over-arching theme? For instance, a graduation gift box may emphasize new beginnings and professional development. Meanwhile, an engagement gift box may reflect activities the couple loves to do together.

Here are a few things to consider when deciding on your gift box theme beyond the occasion:
What are their current passions or hobbies?
What challenges or transitions are they experiencing?
What inside jokes or special memories do you share?
What brings them comfort or joy during difficult times?
What experiences have they mentioned wanting to try?
| Step | Details |
|---|---|
| Choosing Your Theme | Consider recipient's interests, personality, and milestones. |
| Selecting Items | Choose statement pieces, complementary items, and surprises. |
| Adding a Personal Touch | Handwritten notes, inside jokes, and thoughtful additions. |
| Arranging & Decorating | Use layers, dividers, and fillers for a polished look. |
| Final Touches | Consider unique wrapping, dried flowers, and ribbons. |
This is where the fun begins!
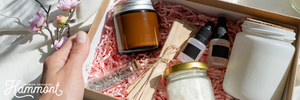
Curate a selection of items for your gift box. This may depend on the size or type of gift box you choose, such as a clear plastic gift box (potentially more suitable for chocolates and treats) or a more sturdy acrylic gift box (which may hold heavier items).
When bringing all these items together, consider:
What items should be statement pieces? (For example, if the book is the main piece of your gift, how can you make it stand out? A ribbon or certain presentation might help!)
What items can complement the main one? (For instance, a book light would work well for a book.)
What small gifts can be great and surprising additions? (This may include smaller bookmarks or treats to go alongside the main part of the gift box.)
| Occasion | Theme Idea | Suggested Items |
|---|---|---|
| Graduation | New Beginnings | Planner, motivational book, coffee gift card |
| Engagement | Couple’s Favorite Things | Customized mugs, candles, love notes |
| Baby Shower | Welcome Baby | Soft blanket, lullaby book, teething toy |
| Birthday | Personalized Joy | Hobby-related gifts, snacks they love |
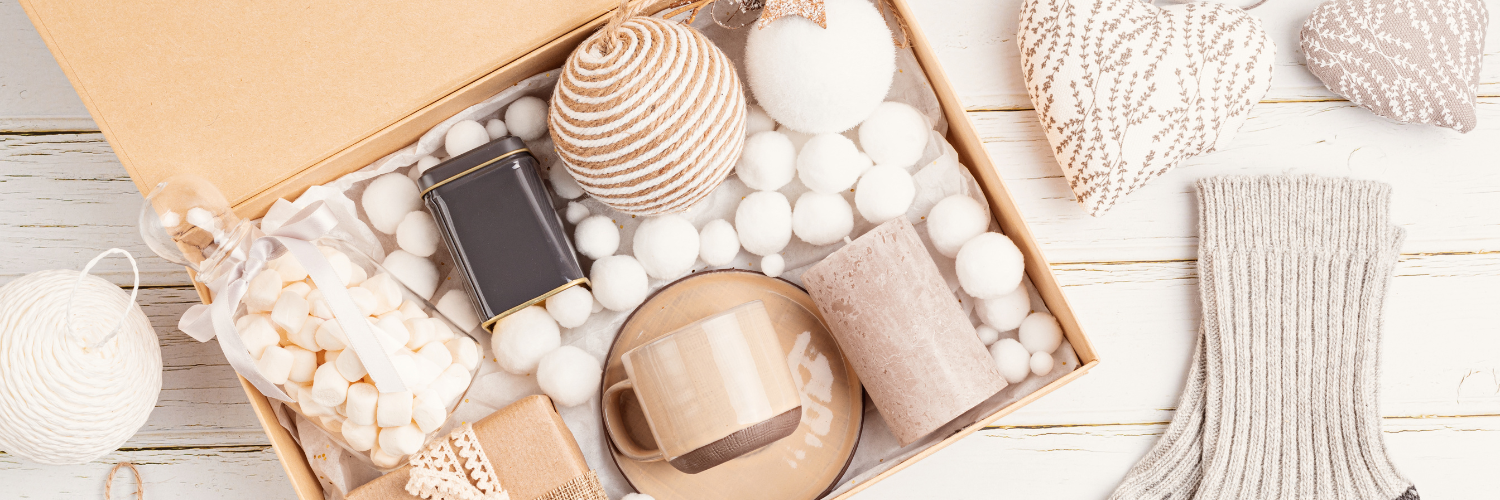
| Holiday | Festive & Cozy | Scented candle, hot cocoa mix, ornament |
Even a personal note on the inside portion of a book can go a long way. Alternatively, writing a small note and attaching it to the gift box works, too! In this note, you can provide an overview of why you selected the gifts you did or simply write from the heart about how you care for the recipient. Add custom cards, inside jokes, homemade treats, and more to further personalize it.

The next step will also add a personal touch—you can decorate and arrange your gift box in many different ways!
This is the part that ties everything together! A thoughtfully arranged box creates that magical moment when the recipient first lifts the lid and is greeted by a visually appealing display of your carefully selected items.
Choosing the right container is your first consideration. While traditional gift boxes work beautifully, don’t limit yourself to conventional options. For instance, this paper magician gift box might be perfect for the magician in your life! Alternatively, this wooden gift box adds a unique and rustic flare to your gift. Select yours from Hammont’s array of gift boxes.
However, ensure you choose something roomy enough to display items without cramming them together but not so large that items shift around or appear lost in empty space. And if you’re shipping your gift box, make sure to factor in any necessary protection against movement during its transit.
From here, you can then create visual layers that invite exploration, with some items partially visible beneath others. Consider placing flat items like cards or photos at the bottom (or affixing them on the outside), medium-sized items in the middle layer, and eye-catching or delicate items on top. This creates a sense of discovery as the recipient explores deeper into the box.
Tissue paper or confetti can also serve many aesthetic (and even protective) purposes. Use it to wrap individual items, create cushioning between products, and provide a colorful backdrop. Choose colors that complement your theme or the recipient’s preferences. Crumpled tissue or confetti pieces can fill empty spaces, while neatly folded sheets create a refined presentation.
For a professional touch, consider using compartments or dividers. Compartments keep items organized and enhance the unboxing experience by creating distinct sections to explore. You can easily make your own with wooden pieces or even decorated cardboard pieces.
And don’t forget about decorating the whole thing! Dried flowers or eucalyptus sprigs add a natural touch, while ribbons tied around individual items create a cohesive look. Sprinkle confetti, dried lavender, or decorative paper shreds between items for color and texture.
Rather than traditional wrapping paper, you may also want to consider fabric wrapping. Alternatively, customize plain boxes with stamps, stickers, or hand-painted designs (These can be great options if you and your kids are doing this together!). You may also opt to adorn the outside with high-quality ribbon, natural elements like twine and dried botanicals, or anything else that aligns with your theme and the occasion.
| Material | Best For | Benefits |
|---|---|---|
| Clear Plastic Box | Chocolates, small treats | Elegant, see-through presentation |
| Acrylic Box | Heavy or delicate items | Sturdy and protective |
| Wooden Box | Rustic, reusable gifts | Unique, adds charm |
| Fabric Wrapping | Sustainable, soft gifts | Eco-friendly, visually appealing |
A thoughtful final touch is to include care instructions if your box contains perishable items or products that require special handling. A small card explaining how to store homemade treats or care for handcrafted items shows foresight and extends the life of your gifts.
When it comes down to it, a gift box isn’t just a gift—it’s an experience. Each layer should spark joy and anticipation, making the unwrapping as special as the items inside. In today’s digital world, the chance to physically unravel something thoughtful is rare, and a well-crafted DIY gift box is a beautiful way to show your care, effort, and attention to detail. Whether it’s a heartfelt note, a carefully chosen selection, or a beautifully arranged presentation, every element adds to the excitement of giving and receiving. So, get creative, have fun, and make your next gift box one to remember!
| Layer | Placement Idea |
|---|---|
| Base Layer | Flat items like letters, photos, or notes |
| Middle Layer | Medium-sized gifts that complement the main item |
| Top Layer | Eye-catching, delicate, or statement gifts |
| Filler & Extras | Tissue paper, confetti, or decorative elements |