Cart
0
You may also like


Book a call with our development team to get started.


Apply online and access wholesale pricing.

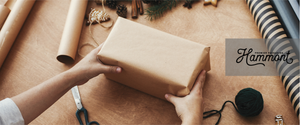
Maybe you’re tight on time or find the cost of a new gift bag a bit out of your budget this time. Whatever your reason is, making a gift bag from wrapping paper can ensure you have a one-of-a-kind presentation. Or perhaps you’ve found the perfect wrapping paper, but it’s just not working for your exact gift, and a bag would be much better!
The good news is that it’s ultra-easy to transform wrapping paper into a gift bag. With a few simple steps, you can do this small project at home, ensuring you show up to the event with gift wrapping that matches the thought and care you put into choosing the gift itself. All you need is a sheet of wrapping paper, some tape, and a few folds to create a custom-sized bag that’s both charming and functional—no store-bought bag required.

Here’s the step-by-step guide on how to make a gift bag out of wrapping paper.
You’ll need:
Your gift
Wrapping paper
Scissors
Tape
Ribbon
A hole puncher (or scissors might suffice here!)
A gift tag (which can also be homemade)
Start by measuring out how much wrapping paper you need. After all, you don’t want it to be too small or too big for your gift. The key is making sure there is enough paper to cover the item fully (on all sides).
Next, it’s time to cut the paper to the size you measured. An easy trick is to fold the paper along the line where you plan to cut—this gives you a clear guide, especially if you’re using regular scissors instead of a special gift wrap cutter.
You’ve now got your piece of paper. Fold each side of the paper so it slightly overlaps the center by a couple of inches. Keep the patterned side facing downward when you do this. But don’t add creases quite yet!
First, check that your gift item will fit within this size; this serves as a last check before you do the rest of the work.
Finally, after you’ve confirmed the size is just right, you can crease that paper!
Tape the wrapping paper down where the two sides overlap in the middle. Make sure to tape the entire length.
Fold up the bottom about one-quarter of the way. Create a crease.
After making a crease at the bottom fold, stand the gift bag upright so the folded section points upward. Then, gently push the left and right sides of the fold inward toward the center. As you do this, the paper will naturally form a diamond shape. Once the diamond appears, press down along the edges to flatten it against the table and create sharp creases.
With the diamond shape in front of you, find the top and bottom points. Take the top point and fold it down toward the center of the diamond, creating a clean crease.
Now, do the same with the bottom point. Fold it up toward the center, slightly overlapping the top fold. It should look similar to how you close an envelope. Press the folds firmly to keep everything in place.
Use clear tape to secure the folded points in the center. This will form the bottom of your gift bag, so make sure it’s strong. Ensure you use four to five pieces of tape to make the bottom extra sturdy and secure, allowing the gift to be held firmly in place.
Gently reach your hand inside the bag and push the bottom outward to start forming the shape.
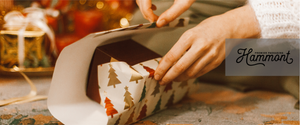
Slide your gift into the bag. Take your time to avoid ripping the paper. The item should sit nicely at the bottom of the bag.
Starting at the top, gently press along each side of the bag and create a crease that runs down toward the gift. This will give your bag a cleaner, more polished shape.
To close the bag, fold the top edge of the paper downward so it lies flat against the front of the bag. Additionally, keep folding as far down as you need so that the top sits at the top of the gift.
Use a hole punch to make two holes about an inch apart along the center of the folded top. These will be for the ribbon.
Cut a piece of ribbon and thread it through both holes. Consider using a ribbon that is about twice as long as the height of the bag, so you will have plenty of length to tie a nice bow.
Slide a gift tag onto the ribbon for a personal touch. Then, tie the ribbon into a neat bow to finish off your handmade gift bag beautifully!
| Step | Action | What It Should Look Like |
|---|---|---|
| 1 | Gather your supplies: gift, wrapping paper, scissors, tape, ribbon, hole puncher, gift tag. | 🪄 Supplies laid out on table |
| 2 | Measure wrapping paper around your gift to ensure proper size. | 📏 Gift on paper with marks for cutting |
| 3 | Cut the paper to size using scissors. | ✂️ Neatly cut paper sheet |
| 4 | Fold paper sides toward center to check fit (pattern side down). | 📦 Gift sitting on paper with folded edges |
| 5 | Crease folds when size is confirmed. | 🔧 Crisp folded edges |
| 6 | Tape the paper seam where sides overlap. | 🏷️ Seam secured with tape |
| 7 | Fold up the bottom of paper about 1/4 of the way. | 🔽 Bottom folded upward |
| 8 | Form diamond shape by tucking sides inward. | 💎 Diamond shape appears at bottom |
| 9 | Fold top point of diamond toward center. | 🔼 Top flap down over diamond |
| 10 | Fold bottom point over top point, slightly overlapping. | 📄 Looks like envelope bottom |
| 11 | Tape the bottom securely with several pieces of tape. | 🔒 Strong taped bottom |
| 12 | Open bag by pushing bottom outward. | 🛍️ Bag starts to take shape |
| 13 | Slide gift inside carefully. | 🎁 Gift sitting inside bag |
| 14 | Crease sides of bag for a polished shape. | 🪄 Smooth structured sides |
| 15 | Fold the top edge of bag downward to close. | 🔽 Neat folded closure |
| 16 | Punch two holes in the folded top center. | 🕳️ Two evenly spaced holes |
| 17 | Thread ribbon through holes and tie into bow. | 🎀 Beautiful tied ribbon bow |
| 18 | Slide gift tag onto ribbon for final touch. | 🏷️ Gift tag in place |