When you give a gift, the first thing people notice isn’t what’s inside—it’s the presentation. A simple box or bag can instantly feel elevated when it’s lined, layered, or wrapped with colorful, folded tissue paper.
But tissue paper has a reputation for being tricky. Wrinkles, tears, and awkward stuffing can make your packaging look rushed instead of refined. Yet, with the right techniques, you can create folds that look polished, effortless, and professional—the kind of presentation you’d expect from high-end boutiques or curated subscription boxes!
This step-by-step guide will show you exactly how to fold tissue paper like a pro, so that next gift you give looks undeniably elegant, sophisticated, and thoughtful. Grab some tissue paper, scissors, tape or glue dots, your gift box or bag, and any finishing touches like ribbons, branded stickers, or twine—and let’s get started!
| Key Takeaways |
|---|
| 🧺 Tissue paper presentation dramatically elevates the perceived value of your gift. |
| 📏 Start with clean edges, a flat surface, and proper measurements for sharp folds. |
| 🎁 Use layering, pleats, or fans to add volume, drama, and luxury to any box or bag. |
| 🔖 Choose tissue textures and finishes that complement the gift’s tone (matte, metallic, kraft, etc.). |
| 🎀 Final touches like ribbons, seals, or branded stickers create a boutique-level experience. |
Start By Choosing the Right Tissue Paper
Picking the right tissue paper makes a huge difference. For example, lightweight sheets are perfect for airy gift-bag plumes, while thicker tissue holds sharper folds for structured box liners.
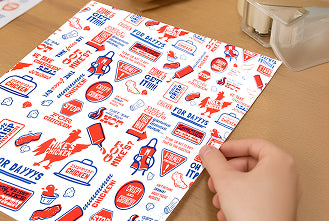
The texture and finish of the paper are also worth your consideration and thought. Matte tissue feels casual and modern, glossy or metallic adds a luxe touch, and soft recycled kraft gives an earthy, minimalist vibe.

If you’re layering multiple sheets, play with colors—a neutral base paired with a pop of bold or metallic instantly makes packaging look curated rather than thrown together.
| Technique | Summary | Best For |
|---|---|---|
| Classic Flat Fold | Fold tissue in center over a box, tuck edges for a clean liner. | Box interiors |
| Diagonal Envelope Fold | Wrap diagonally with 4 corners like an envelope; use double-sided tape. | Luxury wrap styles |
| Reveal Pleated Fold | Accordion-fold a narrow strip to sit under the lid’s edge. | Elegant opening effect |
| Accordion Fan | Pleat multiple sheets vertically to lift out for a dramatic reveal. | High-impact unboxing |
| Gift-Bag Plume | Pinch center, insert folded end, fan out top edges in layers. | Boutique gift bags |
| Bottle Wrap (Petal Fold) | Pull overlapping tissue panels around bottle, tie or seal neck. | Wines, candles, narrow gifts |
| Pillow Fold & Candy Roll | Cushion delicate items or roll long ones diagonally, seal ends. | Fragile or small pieces |
Then Prep Your Workspace for Crisp Folds!
Professional folds start with a smooth foundation. Clear a flat, dry surface and gently press your sheets to remove creases. If your tissue has stubborn wrinkles, lightly smooth it with your hands or place a heavy book on top for a few minutes. While simple, this step gives your folds sharper lines and a neater finish.
Prepare Properly: Square, Stack, and Measure
Before you start folding, align and size your tissue properly. Stack your sheets neatly, match the edges, and trim off any uneven ends.
If you’re lining a box, measure the interior so your folds sit exactly where you want them—too much overhang looks messy, and too little can make the tissue bunch awkward.
Master the Classic Flat Fold (Box Liner)
This is the go-to technique for lining gift boxes. Start by laying one or two sheets inside the box so they drape evenly over the edges. Fold the sides inward so the edges meet at the center, creating a neat spine. Tuck any extra length underneath to keep the inside looking clean and intentional.
And for a fuller look, layer two contrasting sheets at slight angles; this adds dimension and a subtle pop of color when the recipient opens the box!
Perfect the Diagonal Envelope Fold (Polished Box Wrap)
If you’ve ever admired the sleek wrapping at luxury boutiques, this is the technique they often use. Place your tissue diagonally, so it forms a diamond shape, and position the box in the center. Fold one corner up and over the box, then fold the opposite corner snugly on top. Finally, tuck in the remaining two corners like sealing an envelope, securing them discreetly with double-sided tape.
This technique results in crisp edges and a sophisticated finish without bulky seams!
Create a Reveal Fold Under the Lid
For a premium, store-quality touch, use a reveal fold beneath the lid. Simply take a narrow strip of tissue and fold it into small, even pleats, like a soft accordion. Align the pleated edge perfectly with the box’s opening so the lid presses it flat.
Make the Accordion Fan (Lift-Out Presentation)
Want to give your unboxing moment a little drama? The accordion fan is a favorite for upscale packaging: fold one or two sheets back and forth into equal pleats, creating a tidy stack. Trim the edges to make them square, then place the fan vertically inside the box so it slightly rises above the items.
When someone opens the package, the layered folds naturally lift out, creating a sense of surprise and elegance!
Build the Gift-Bag Plume
That fluffy, overflowing tissue you see in boutique gift bags has a fairly simple trick to it!
Start by laying a sheet flat, pinch it at the center, and lift it gently. Give it one light shake to let the folds fall naturally, then fold the bottom “stem” of the tissue and place it into the bag. The top should fan out into soft peaks.
For extra volume, layer multiple sheets at different angles and heights. Mixing solid colors with metallic accents also makes the presentation pop.
Wrap Bottles & Cylinders
Bottles and other tall, narrow items can be tricky, but this petal fold makes them look polished: center the bottle on a sheet of tissue, then pull one panel up and smooth it neatly along the neck. Work around the bottle in overlapping sections, letting each piece slightly cover the previous one, similar to delicate flower petals. Tie it off with a slim ribbon or secure it with a seal for a clean, professional look!
Don’t Forget to Cushion Fragile Items (But With Style!)
Tissue paper also works well to protect your gifts, too. For small, delicate objects, try the pillow fold: place the item in the center, bring opposite corners together, and tuck the extra underneath to form a padded base.
For longer items, roll them diagonally in the tissue, folding the edges inward at the ends like a candy wrapper.
Seal, Tie, and Brand
The details truly make all the difference. Use branded stickers or wax seals to hold folds in place without tearing the paper. For gift bags or boutique boxes, a small ribbon or twine tie adds an understated finishing touch. When packaging products, discreet glue dots are better than visible tape since they are more likely to create a seamless and professional appearance!
Wrapping It All Up…
Folding tissue paper like a pro requires a little intention and creativity to enhance your presentation. Whether you’re styling a simple bag, lining a premium gift box, or protecting something delicate, the above techniques can make your packaging feel thoughtful and elevated.
So, the next time you wrap a gift, experiment with colors, textures, and folds. With a little practice, your packages will look boutique-worthy every time!
Need help with selecting premium packaging for your next gift? Look no further than Hammont Packaging!
| FAQs: Folding Tissue Paper |
|---|
|
Q: How do I stop tissue paper from tearing while folding? A: Use gentle pressure, avoid sharp creases, and prep the paper flat before folding. Thicker sheets resist tearing better. |
|
Q: Should I iron tissue paper to remove wrinkles? A: Not with heat—but placing a heavy book over it for a few minutes works wonders. Always handle tissue gently. |
|
Q: Can I reuse folded tissue paper? A: Yes! Just refold neatly and store flat. Premium tissue is surprisingly durable for multiple uses. |
|
Q: What’s the best fold for shipping fragile items? A: Try the pillow fold or candy roll—both provide cushion and help keep items in place inside the box. |
|
Q: How do I keep tissue in place without visible tape? A: Use clear glue dots, washi tape tabs, or branded stickers that double as a design accent. |

