By no means is everyone expected to be a master gift wrapper! But with the internet, there are plenty of ways to learn - such as by reading through the steps in this article. If you’ve ever wondered how to properly layer tissue paper in gift bags, here’s everything you need to know.

Step 1: Select the Tissue Paper
Before you start layering, you need to choose the right tissue paper. Start by matching the color scheme to the gift bag. You can go for complementary tones, monochromatic themes, or a pop of contrast. For example, a gold bag pairs beautifully with ivory and blush tissue paper. A Kraft paper bag, on the other hand, may look more chic with a forest green or a deep red.
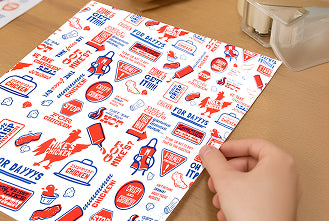
Consider the occasion as well! Soft pastels work great for baby showers, while bold tones and metallics may be more appropriate for birthdays or holidays. You can also find tissue paper with patterns, foil prints, or festive designs that match specific events. In some cases, you may also be able to create custom prints, if your budget and time allow.
Size is another thing to keep in mind; standard tissue paper sheets are typically 20 x 26 inches, which works well for medium-sized bags. For smaller gift bags, you can cut the sheets down.
Step 2: Fluff & Add a Bit of Tissue Paper to the Bag
Take one or two sheets of tissue paper and hold them at the center, pinching gently to create a cone-like shape. Then, fluff the paper by pulling and separating the folds slightly. This gives the paper that signature fluffy/out-of-the-bag look.
Place these first sheets into the empty gift bag, pointed side down and fanned out around the edges. This acts as your base and gives the appearance of fullness even before the gift is added.
Step 3: Insert the Gift
Now that you have your base, place your gift inside. If the gift itself is fragile or delicate, you may want to first wrap it in tissue paper before placing it inside the bag. And don’t just drop it in! Be gentle so you don’t disturb your initial tissue paper layer.
Now is also a great time to add a card or note, if applicable.
Step 4: Add More Tissue Paper
This is where the gift packaging really comes to life! This top, polished layer adds the “fullness” and a professional look every time. Grab two to four sheets of tissue paper. Just like step two, fluff the paper by gently pinching the center to create a cone shape. Then, arrange these individual sheets around the gift. Make sure to tuck those pointy bits down and ensure the tops fan out over the top of the bag.
If using two different colors, ensure you alternate between them so you create a versatile pattern that doesn’t include too much of one or the other.
Step 5: Even Out the Tissue Paper
Once all the paper is in place, take a moment to step back and adjust. Gently tug or twist individual pieces until the spacing feels balanced. You want to avoid gaps, flat spots, or a lopsided look. If you need, add a few more pieces to make it look “full.”
Ideally, the paper should be sticking out evenly from every side. Feel free to also press any bits down to fluff it or fan it out even more. Just be careful not to rip it!
Step 6: Add Any Final Touches
If you want to go the extra mile, you can also add a few finishing touches, such as:
-
Tying a ribbon (of the same color scheme) around the handles.
-
Fixing a gift tag to the handles.
-
Adding a candy cane, thyme, or charm to the handles for a festive touch.
-
Seal the handles together using an appropriately themed sticker.
The goal here is to truly complete your gift. And keep in mind that sometimes, less is more. Not all gifts require a finishing touch. For many occasions and gifts, simplicity is best.
| Step | Action | Extra Tip |
|---|---|---|
| 1 | Select the tissue paper that matches the color scheme or occasion. | Go for complementary tones like gold & blush, or patterns for holidays. Cut paper down for smaller bags. |
| 2 | Pinch and fluff 1–2 sheets into cone shapes and place them inside the bag. | These sheets create the base and give the appearance of fullness. |
| 3 | Gently place the gift inside the bag, possibly wrapped in tissue. | Add a card or note here if needed. Handle fragile items with care. |
| 4 | Add 2–4 more fluffed sheets around the gift for fullness. | Alternate colors for a balanced, professional look. Fan paper outward. |
| 5 | Adjust and space out tissue paper for even distribution. | Avoid gaps and lopsidedness. Add extra sheets if needed. |
| 6 | Add final touches like ribbon, tag, charm, or sticker. | Less can be more. Keep it simple unless the occasion calls for extra flair. |
Remember, Practice Makes Perfect!
Over time, you’ll get better at this—even if things aren’t looking great right out of the gate. You could also practice (especially if you know you’ll have excess tissue paper). With a bit of care, time, thought, and attention, your gift bag can look truly magical and even boutique-worthy!

