Cart
0
You may also like


Book a call with our development team to get started.


Apply online and access wholesale pricing.
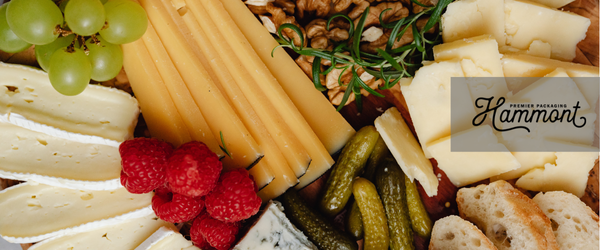
Who doesn’t love a yummy and visually stunning charcuterie layout? But forking out hundreds of dollars for a professional to make one can feel a bit extreme—even for those of us with this kind of budget. Plus, cheese boards are an easy DIY for any occasion.
Whether you’re attending a potluck or hosting festivities, a cheese board is a staple piece that everyone loves. It’s easy to transport. It’s got something for everyone. And it can be ultra-fun to display. So, let’s get started. Here’s our step-by-step guide to creating the cheese board of your dreams and expert tips to help you out.
| Step | Action | Details / Questions to Ask |
|---|---|---|
| 1 | Select Your Cheese Board | How many people? Shape/size? Towered or handles? |
| 2 | Add Bowls & Cheeses | 3–5 cheeses, mix soft/hard, small bowls for sauces |
| 3 | Add Meats, Breads & Crackers | Spicy/mild meats, various textures |
| 4 | Fill Empty Spaces | Use fruits, nuts, pickles to fill in gaps |
| 5 | Add Finishing Touches | Honey drizzle, herbs, edible flowers |
The perfect cheese board starts with choosing the wooden board everything will lay on top of. Consider:
How many people will be at the occasion? This will help determine the size or how many you need.
What shape do you think will work best for it? You may want to think about what else you’ll be serving and how it fits in.
Does it need handles? Is a towered look in line with the theme of the event?
Then, grab your cheese board and start assembling!

These are the big items that are going to take up the most space on the board. The bowls will hold sauces, like tzatziki, hummus, or jellies. The bowls are also a great spot to place pickles or assorted nuts.
Meanwhile, you’ll probably want at least three to five different cheeses to appease all tastebuds. Some examples include cheddar (the older, the better!), gouda, brie, havarti, goat cheese, and blue cheese. Try to have a mix of soft and hard cheeses for variety. And make sure each one has a serving knife.
| Category | Examples | Notes |
|---|---|---|
| Cheeses | Cheddar, Brie, Gouda, Blue, Goat | Include 3–5, soft & hard |
| Meats | Salami, Prosciutto, Jerky | Spicy and mild options |
| Breads | Baguette, Ciabatta, Rye | Mix of textures |
| Crackers | Multigrain, Seeded, Herbal | Add crunch |
| Spreads/Sauces | Hummus, Tzatziki, Jellies | Use small bowls |
| Fruits | Grapes, Blueberries | Fresh or dried |
| Nuts & Pickles | Almonds, Pickles, Cornichons | Color & crunch |
There are tons of options here. For meats, you could include:
Prosciutto
Salami (spicy and/or regular)
Mortadella
Chorizo
Ham
Pepperoni
Pate
Beef Jerky
Examples of bread for your board with a mix of different textures include:
Baguette
Pita
Ciabatta
Sourdough
French bread
Breadsticks
Rye bread
Then, there’s your crackers for even more of a crunch. Try:
Multigrain crackers
Water crackers
Seeded crackers
Herbal crackers (Rosemary crackers from the store can be great with cheese!)
The key is to get a solid variety of all of the above. What are some of your and your friends or family’s favorites? Make sure to include those!
If you haven’t added nuts or pickles to your bowls, this is where you can add them! Fill in any extra space with these sprinkled throughout the board. Fruits, like grapes, blueberries, or strawberries, are also yummy additions!
| Tip # | Tip Title | Description |
|---|---|---|
| 1 | Time the Temperature | Let cheese breathe before serving |
| 2 | Cutting Techniques | Different cuts for hard vs. soft cheeses |
| 3 | Consider the Season | Match ingredients seasonally |
| 4 | Unexpected Elements | Chocolate, pickled berries, infused honey |
| 5 | Play with Height | Elevate with ramekins, stacks |
| 6 | Finishing Touches | Honey drizzle, herb confetti |
But wait—there’s more! Here are some additional tips to help you craft the best cheese board around:
Cheese needs to breathe to reach its peak flavor. So, consider this: Remove firmer cheeses from refrigeration 45-60 minutes before serving, while softer varieties need just 20-30 minutes. This step allows the fats to soften and aromatic compounds to develop.

If this feels like a lot, don’t worry. You can still arrange the cheeses on your board while cold for easier handling, then allow them to temper once arranged.
Each cheese style has its own cutting approach, as you can likely tell by how firm or soft it is. Cut aged firm cheeses like Parmesan into irregular chunks to showcase their crystalline texture. For semi-firm varieties like Gouda and cheddar or soft options like Brie, sticking a serving knife into them works well, too!
Summer calls for fresh berries, stone fruits, and lighter honey varieties. Fall invites apple slices, pear fans, and spiced chutneys. Winter boards shine with dried fruits, candied nuts, and rich preserves. Spring welcomes fresh herbs, young vegetables, and floral honey. This seasonal approach ensures your board always feels fresh and relevant!
Move beyond traditional pairings with surprising additions. Try chocolate—dark with aged Gouda, milk with blue cheese. Incorporate pickled elements beyond cornichons—pickled blueberries, cherries, or fennel add bright acidity. Infused honey (try truffle, lavender, or hot pepper) creates memorable flavor experiences. Even edible flowers can serve as both garnish and complementary flavor notes. And ginger snaps actually taste incredible with cheddar cheese. So, experiment; have fun with it! Tasting is supposed to be a bit of an adventure.
Professional cheese boards incorporate height for visual interest and practical spacing, and you can 110% steal this idea.

Use small, inverted ramekins under certain elements to create elevated platforms, stack crackers vertically in small groupings, or fold charcuterie into roses or waves. These techniques maximize limited space while creating an abundant impression.
Drizzle honey artfully over specific cheeses, add a light sprinkle of finishing salt to neutral crackers, scatter fresh herb leaves like tiny confetti, or add a mist of truffle oil over a section. These last-minute additions provide aromatic intrigue and visual polish.
| Step | Ingredients / Tools | Examples | Pro Tip |
|---|---|---|---|
| 1 | Cheese Board | Handled wood, round/square | Pick a shape/size to match event |
| 2 | Cheeses & Bowls | Brie, cheddar, hummus | Use 3–5 cheeses & variety sauces |
| 3 | Meats, Breads, Crackers | Salami, baguette, rosemary crackers | Include spicy, mild, textured items |
| 4 | Filler Items | Grapes, almonds, pickles | Fill empty spaces with color |
| 5 | Finishing Touches | Honey drizzle, herbs | Elevate with scent & color |
Whatever you choose to do, it all starts with that wooden board. At Hammont, our various boards offer something for every occasion. Start your party planning or gift wrapping with us!