Cart
0
You may also like


Book a call with our development team to get started.


Apply online and access wholesale pricing.
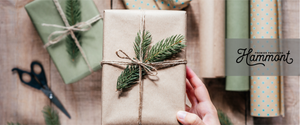
Does your gift wrapping leave something to be desired? While you might be staring at a potentially beautiful present, all that crinkled paper, uneven edges, and tape overload can turn it into a bit of an eyesore. But it’s possible to master this craft. You can take dull and uneven wrapping and transform it into an elegantly wrapped present—one that the recipient is proud to open!
So, how can you do that? Here are all the tips you need to create an eye-catching and aesthetically pleasing gift wrap.
At the end of the day, gift wrapping is an art. Yet, this doesn’t mean you need to be an artist to make your gifts look perfect each and every time. So, keep reading to uncover our top dos and don’ts.
Cheap wrapping paper might seem like a great deal, but it might also rip as soon as you put one crinkle in it. Opt for high-quality and thicker variations instead. These will hold your wrap and won’t let you down if you need to reconfigure.

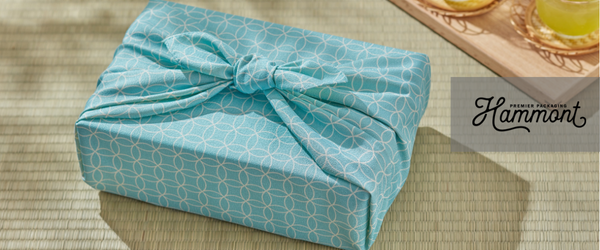
When in doubt, you can also use gift boxes or bags instead. These always look classy and elegant—minus any fuss!
It might feel safer to use extra paper, but going overboard can make your gift look bulky and crinkled instead of clean and polished. Rushed wrapping often leads to this, so try to give yourself plenty of time. That way, you can measure properly and wrap with care.
Invest in good tools—they make all the difference. A sharp pair of scissors designed specifically for cutting paper will create clean, precise edges rather than jagged tears that detract from your presentation. Look for scissors with comfortable handles and blades that glide smoothly through wrapping paper.
As for tape, transparent double-sided tape is practically invisible when applied correctly, creating a seamless look. Alternatively, a high-quality clear tape dispenser saves time and prevents frustration when you're in the middle of wrapping.
A common mistake many gift wrappers make is working with the paper’s decorative side facing up throughout the entire wrapping process.
Instead, place your gift in the center of the paper with the design facing down. This approach allows you to see exactly where to make folds, precisely position your tape, and spot any potential wrinkles or misalignments before they become permanent.
When you flip the wrapped package over, you’ll reveal a pristine surface free of tape marks, finger smudges, or visible corrections. This produces a polished, professional finish that looks like it came straight from a boutique gift shop.
The difference between an ordinary wrapped gift and one that makes someone gasp with delight often comes down to those final decorative elements. Rather than settling for generic stick-on bows, invest in luxurious ribbons, sophisticated wired trims, or handcrafted embellishments that complement your wrapping paper.
Consider natural elements like dried orange slices, cinnamon sticks, or sprigs of eucalyptus for a sensory experience that engages more than just sight.
Personalized gift tags or small ornaments are other thoughtful touches that transform a simple package into a gift-giving experience that shows genuine care and attention to detail.
It’s tempting to throw a bunch of gifts into one big package—especially if they’re all for the same person—but try to resist the urge. Wrapping each item separately adds a little extra magic to the unwrapping experience. It turns one gift into multiple moments of surprise and excitement.
Plus, it gives you the chance to tailor the wrapping to each item: maybe soft tissue for something delicate, a sturdy box for clothes, or fun, themed paper that matches their hobbies. Separating gifts also keeps them from bumping into each other or forming a weird, lumpy package. Most of all, it shows you’ve put real thought and care into each present and into making the person on the other end feel special.
Want to make your gift wrapping look instantly more polished? Swap out regular tape for double-sided tape. It hides underneath the paper, so you don’t get those shiny seams or visible strips holding everything together.
Just run a bit along the edges before folding, and voila—clean, crisp lines that look like a pro wrapped it.
Rushing through gift wrapping almost always shows—bunched-up corners, tape everywhere, crooked ribbons; it’s the classic last-minute look. But wrapping doesn’t have to be a stressful scramble.
We’ve already mentioned how important it is to make time for it, and this is why! When you slow down and give each gift the attention it deserves, the results are so much better.
So, try setting up a little wrapping station with everything you need within reach, put on some holiday music, maybe pour yourself a cozy drink, and turn it into a moment. Treat wrapping like part of the giving, not just something to check off your list.
| ✅ Do | ❌ Don’t |
|---|---|
| Use durable, thick wrapping paper or opt for gift boxes/bags | Use too much paper—it leads to bulky and crinkled wrapping |
| Use sharp, quality scissors and double-sided or clear tape | Wrap with the decorative side facing up (flips the process backward) |
| Add luxurious or natural finishing touches like ribbons or dried elements | Wrap multiple items together—it creates a messy, lumpy result |
| Use double-sided tape for seamless edges | Rush the process—wrapping should be thoughtful and unrushed |