Cart
0
You may also like


Book a call with our development team to get started.


Apply online and access wholesale pricing.
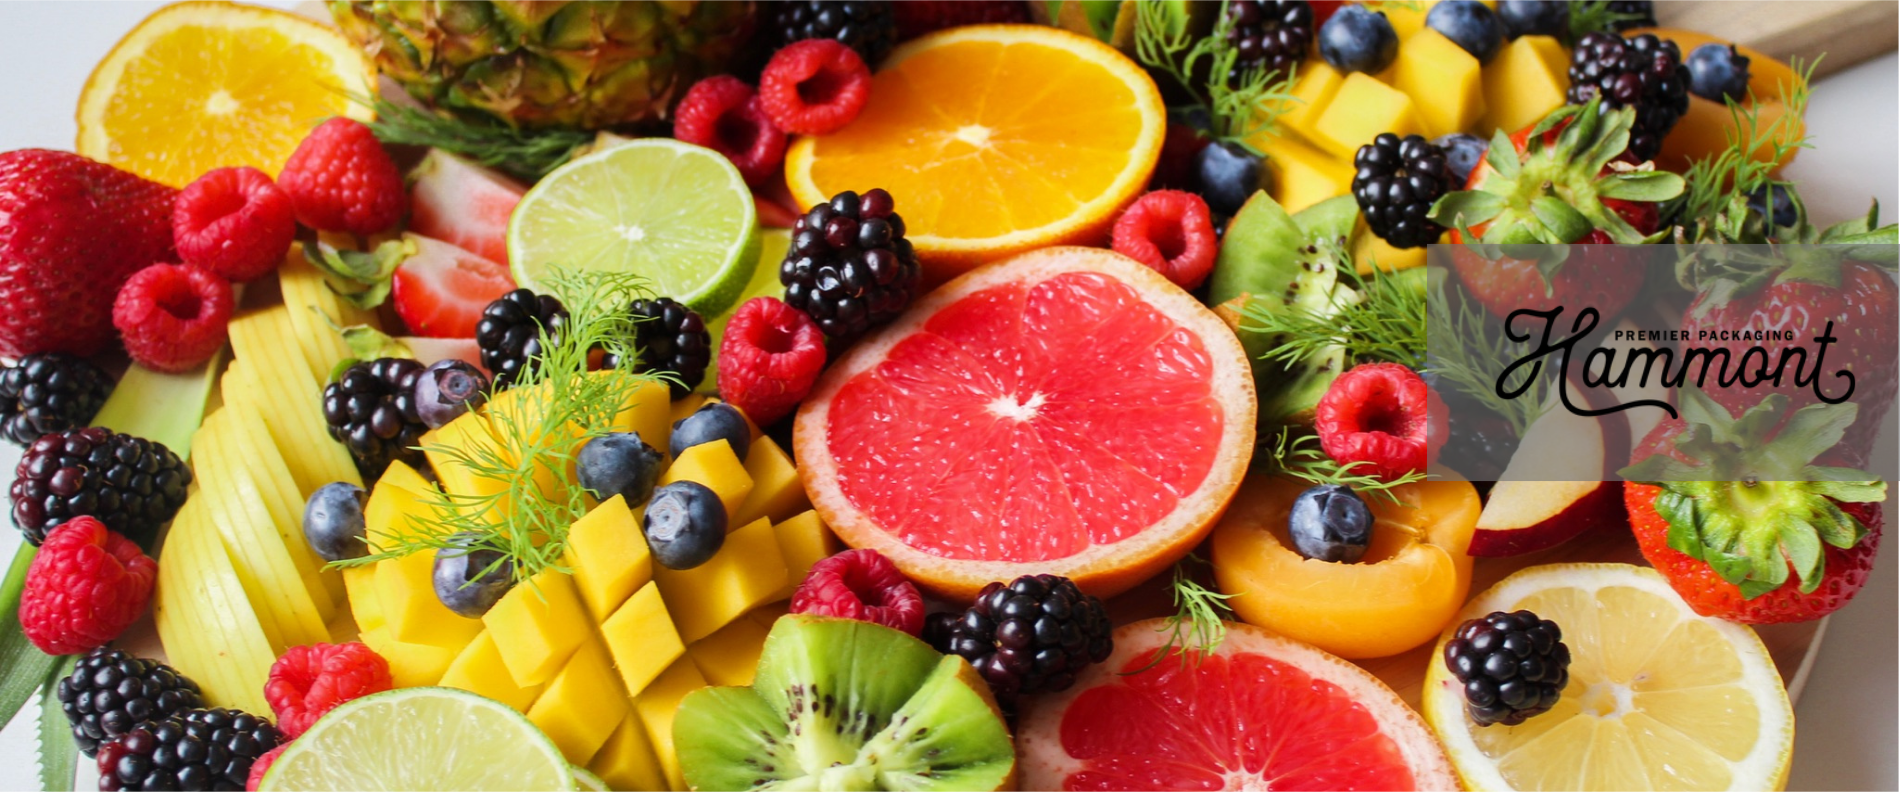
Fresh, colorful, and almost too pretty to eat—this is the essence of a well-made fruit platter! These platters can turn simple ingredients into something truly special.
Whether you’re putting together a casual brunch spread, hosting a dinner party, or just trying to make healthy snacks a little more exciting at home, a beautifully arranged fruit platter always brings a little extra wow.
In this guide, we explore step-by-step how to make the ultimate fruit platter. And don’t worry; it won’t look too good to eat. We bet everyone will be dying to dig into the juicy and delightful display of colors!
From round wooden boards to rectangular ones and more, you have plenty of choices here. But either way, this is definitely where you’ll want to start. The size and shape will determine how many fruits you need to fill it up. After all, we want the board to look full—at least until everyone starts digging in!
When selecting your board, consider:
How many people will be attending
The vibe of the gathering
Other decors or colors used at the event
These factors can help make your choice easier and guide your decision-making.
The foundation of any stunning fruit platter is, of course, the fruits themselves! When selecting your fruits, consider these key factors:
Season and Freshness: Opt for fruits that are in season for the best flavor, color, and value. Fresh, ripe fruits will not only taste better but will hold their appearance longer on your platter.
Color Variety: Create visual interest by selecting fruits in a rainbow of colors—bright reds (strawberries, watermelon), vibrant oranges and yellows (mangoes, pineapple), purples (grapes, blackberries), and greens (kiwi, honeydew).
Texture Contrast: Mix soft fruits (berries, sliced peaches) with firmer options (apple slices, pear wedges) to provide textural variety that makes the platter more interesting to both the eye and palate.
Size Diversity: Combine small fruits (blueberries, raspberries) with larger cut fruits (melon chunks, orange segments) to create dimension and allow for easy serving options.
Flavor Balance: Include a mix of sweet (pineapple, strawberries), tart (kiwi, green apples), and more neutral fruits (bananas, melon) to satisfy different taste preferences among your guests.
Keep in mind that while exotic fruits can make your platter more intriguing, familiar favorites ensure everyone finds something they’ll enjoy. Overall, aim for five to seven different fruits for a medium-sized platter.

Now it’s time to do a bit of work!
While you’ve likely selected different sizes and textures of fruits, cutting them can also create these unique effects. For instance, you could cut a pineapple or watermelon into stars or hearts. Inevitably, berries can be left whole for a pop of color and texture. Meanwhile, kiwis, mangoes, and apples can be sliced thin or fanned out for a more elegant look.
A few things to keep in mind, though… Make sure all fruit is bite-sized; this makes it easy for your guests to enjoy them! For fruits that brown quickly, consider dipping them in lemon water before displaying for the ultimate fresh look; this works particularly well for apples, pears, or bananas.
Now, we get to the fun part. With your chopped and shaped fruit, it’s time to determine the presentation and arrangement of all of the parts.
Start by placing your larger fruit pieces first—like melon slices, pineapple chunks, or halved citrus. These will act as anchors for your layout. Then, fill in the gaps with smaller fruits like berries, grapes, or kiwi slices.
While there’s no perfect way to do this, use your creative eye to mix and match and make your platter truly shine!
If you still feel like it’s missing something, you can add a little more to it. These small touches can make your fruit platter look extra full and appealing. Consider adding:
A small dipping bowl of yogurt, honey, or chocolate
Chunks of dark or milk chocolate
Nuts (like candied pecans, almonds, or pistachios)
Edible flowers
Lastly, here are a few other things to keep in mind:
Group your fruits by color or type
Try to stick to odd numbers for amounts
Add differing heights and textures
Leave no space empty!
Create a charcuterie board to go next to your platter
Keep it chill (in the fridge) before serving
| Step | Description | Key Tips |
|---|---|---|
| 1. Choose a Platter | Select a wooden board or dish based on event vibe, number of guests, and available space. | Go for a platter that looks full when loaded, but not overcrowded. Match the style to your event theme. |
| 2. Pick Your Fruits | Choose 5–7 fruits with a variety of colors, textures, sizes, and flavors. | Seasonal fruits offer the best taste and color. Think about balance—sweet, tart, soft, and firm. |
| 3. Prep the Fruit | Wash, peel, and slice everything into bite-sized, appealing shapes. | Use lemon water to keep fruits like apples and pears from browning. Keep berries whole for color pops. |
| 4. Arrange It All | Start with large fruits, then fill gaps with smaller ones. Layer and overlap for depth. | Use symmetry or flow depending on your style. Alternate colors for contrast. |
| 5. Add Extras | Add yogurt dip, nuts, chocolate, or edible flowers to elevate the look. | Small bowls or chunks can break up colors and textures beautifully. |
Creating a fruit platter is truly an art form that balances visual appeal with delicious flavors. Whether you’re a first-timer or a seasoned entertainer, remember that there are no strict rules, just helpful guidelines.
Your unique touch is what transforms a simple arrangement of fruits into a memorable centerpiece that guests will eagerly gather around. As you practice, you’ll develop your own signature style and favorite combinations. So grab that wooden board, select your seasonal favorites, and let your creativity flow. Enjoy the process, and watch as your edible masterpiece brings smiles to everyone who shares it!